BLOG
Travel and photography blog by Tomas Havel.

10 Best Photography Spots on Madeira
Madeira is a must-visit destination for landscape photographers due to its striking coastline, gorgeous mountains, and unpredictable weather.
Photography Guide to Madeira
10 Best Locations for Photographers
Madeira is a must-visit destination for landscape photographers due to its striking coastline, gorgeous mountains, and unpredictable weather. In this article, I will share some of my favorite photography spots on the island. Whether you're a seasoned pro or a beginner, Madeira has something to offer for every level of photographer.
Download the Complete Travel Guide to Madeira Islands
With over 320 points of interest on Google Maps app

Why Madeira is an Ideal Photography Destination
Madeira is a stunning island that offers breathtaking rugged coastlines, majestic mountains that often have clouds at their peaks, and magical foggy forests. I compiled a list of the 10 best photography spots on Madeira. These include breathtaking sunrise and sunset viewpoints where you can capture the golden light of the day against the island's impressive landscapes.
Madeira is often referred to as the secret European Hawaii due to its striking similarities in beauty. It's a place where you could spend weeks exploring and still not discover all of its wonders. Every turn of the road might reveal a breathtaking vista, and every path leads to something extraordinary. For landscape photographers, Madeira is a true paradise with endless opportunities to capture stunning seascapes, mountains, waterfalls, and forests. No matter your preferred subject, you will never run out of compositions to capture on this breathtaking island


10 Top Photography Spots on Madeira
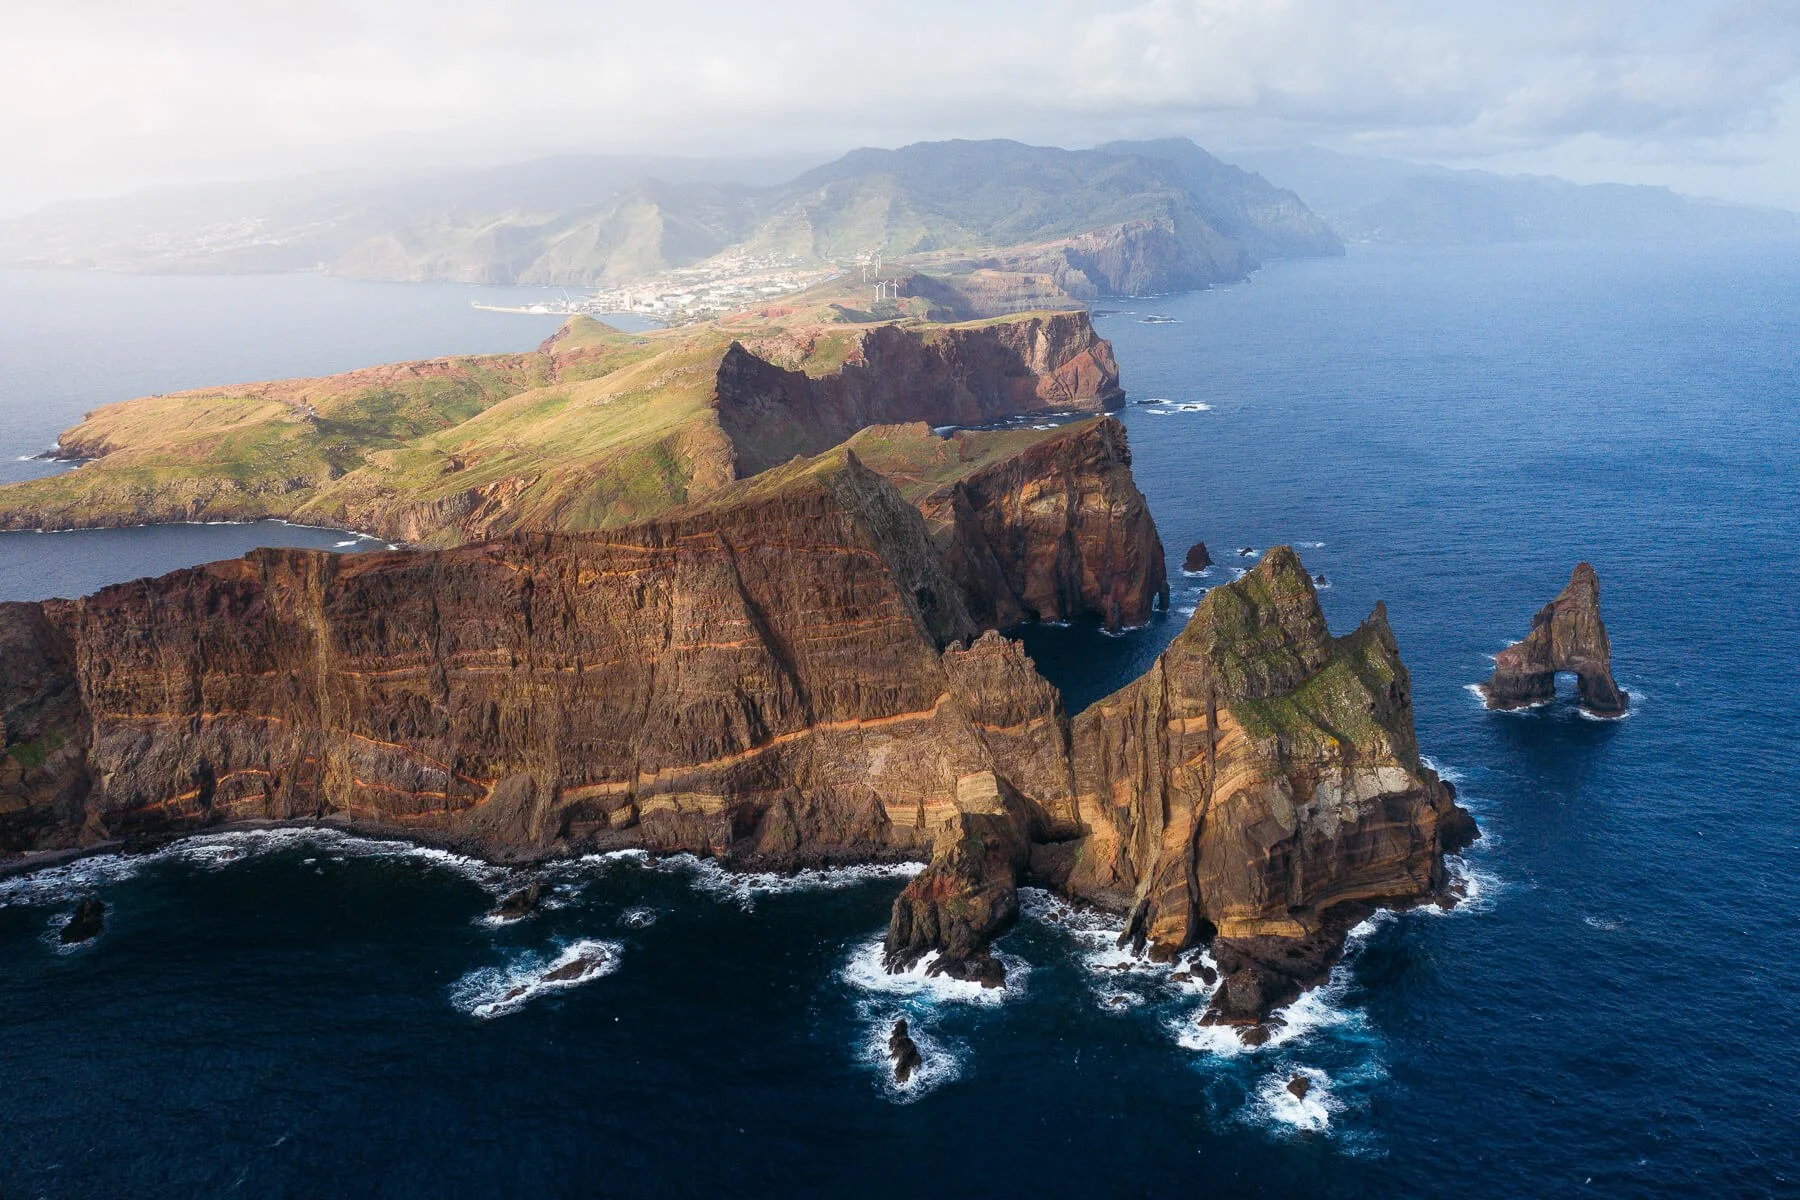
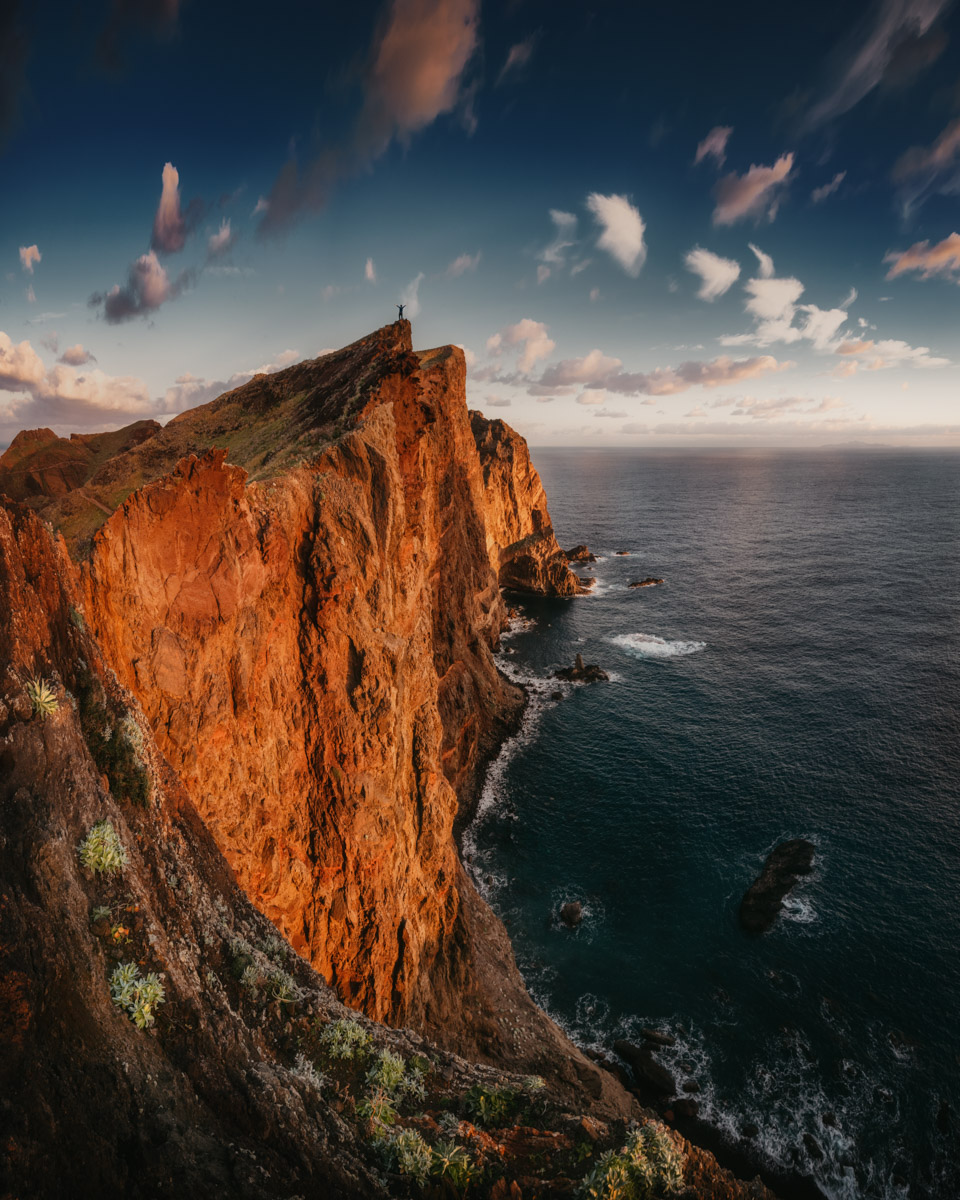
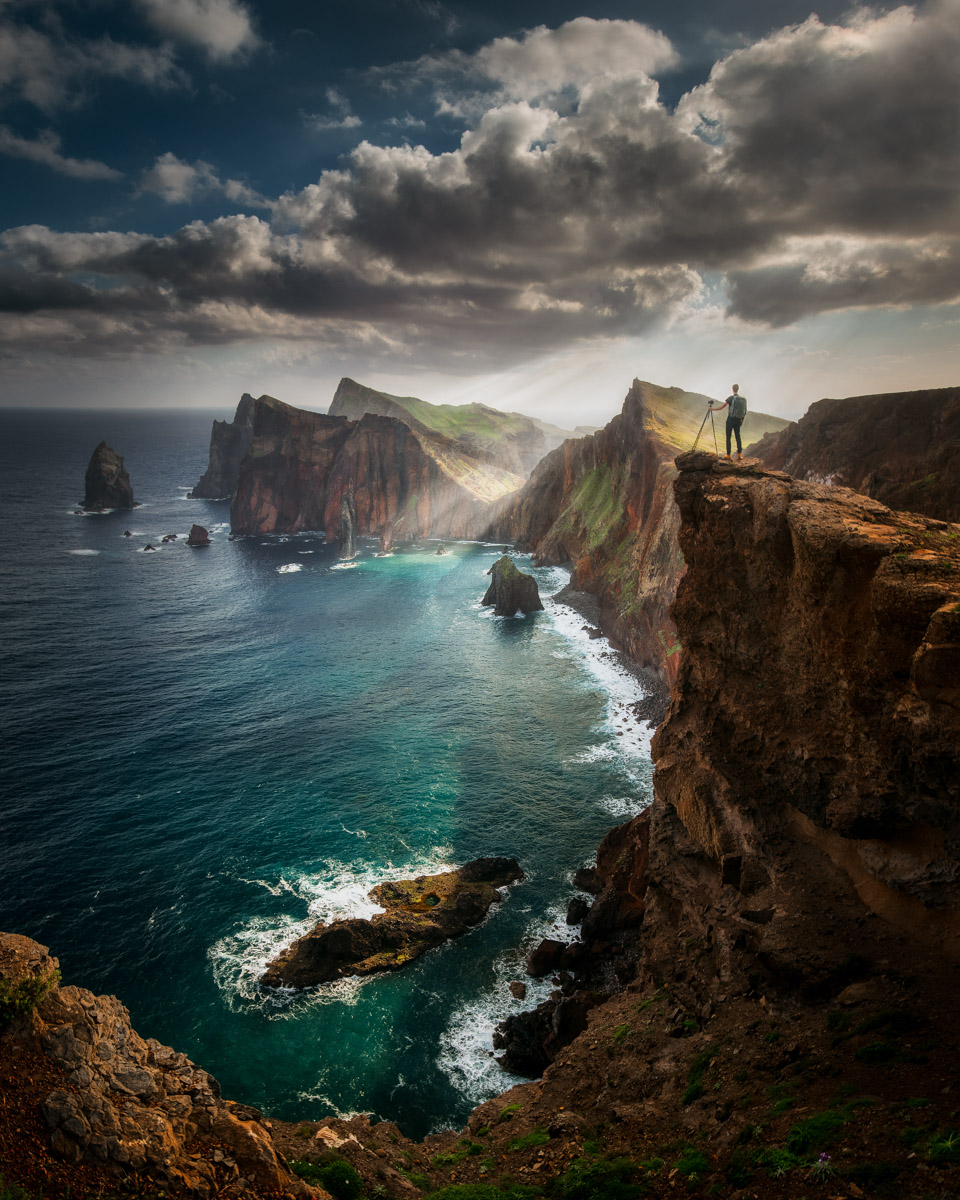
Ponta de São Lourenço
Ponta de São Lourenço is the easternmost point of Madeira and a rocky peninsula that stretches out into the ocean. It's an excellent spot for photographing the dramatic Madeira coastline. To get there, you'll need to park at the end of the ER109 road and walk. The trail is relatively easy and will take you to the Miradouro Ponta do Furado viewpoint, about 3.5 kilometers away. The path is mostly flat, but there is a steep incline at the end.


Ponta do Rosto
Ponta do Rosto is a great sunrise viewpoint that offers breathtaking views of the ocean and the volcanic cliffs of Ponta de São Lourenço. It's easy to access by car and is a perfect spot for sunrise photography. Located at the easternmost end of the island, Ponta do Rosto offers impressive views of the cliffs and the rising sun. There are several excellent photography locations at Ponta do Rosto.


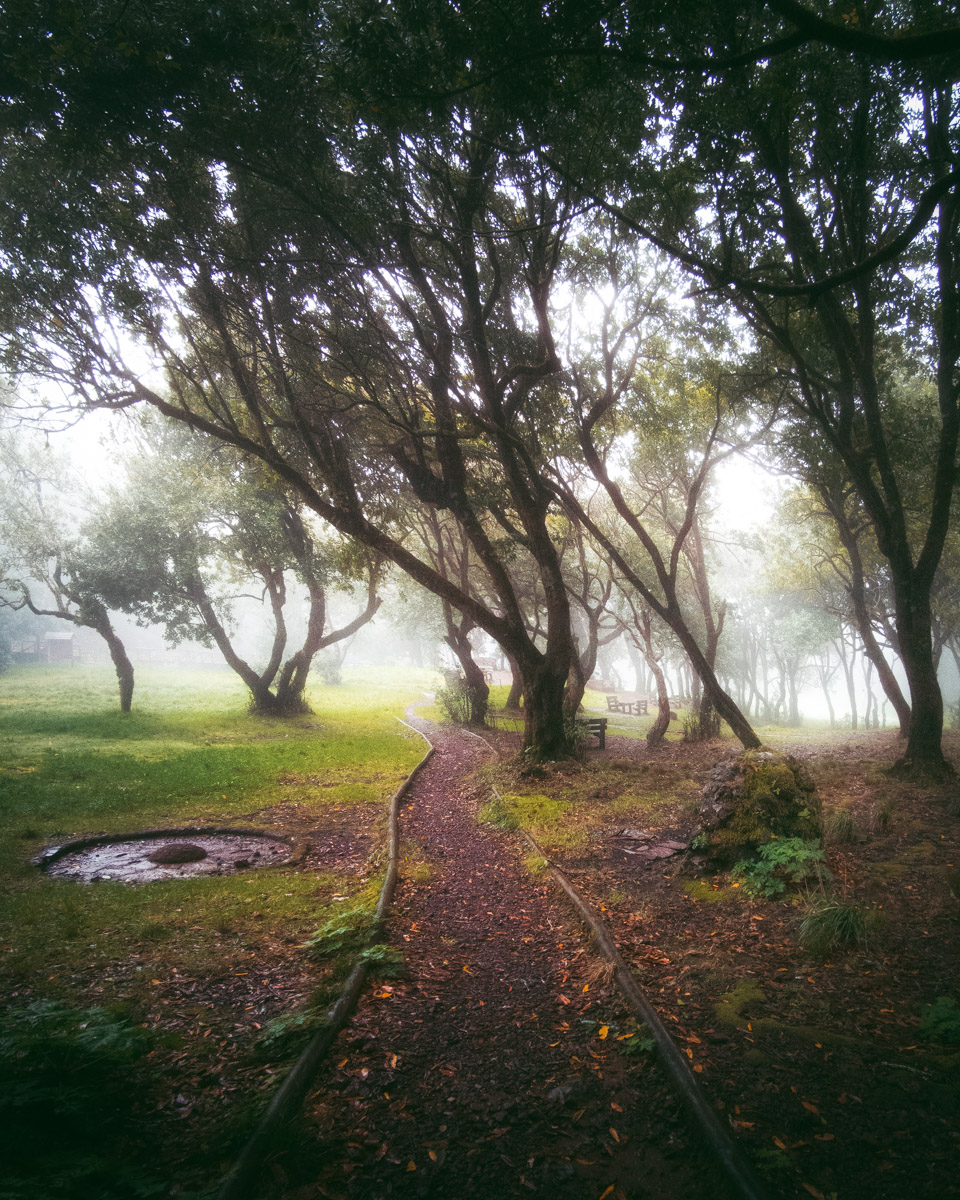
Fañal Forest
Fañal forest is one of the most well-known photography locations on Madeira. Located in the northwest of the island, it's a great choice for overcast days when other locations may not offer ideal lighting conditions. The high altitude of Fañal forest often leads to it being shrouded in clouds, which can add an eerie, supernatural quality to the trees and create interesting photography opportunities.
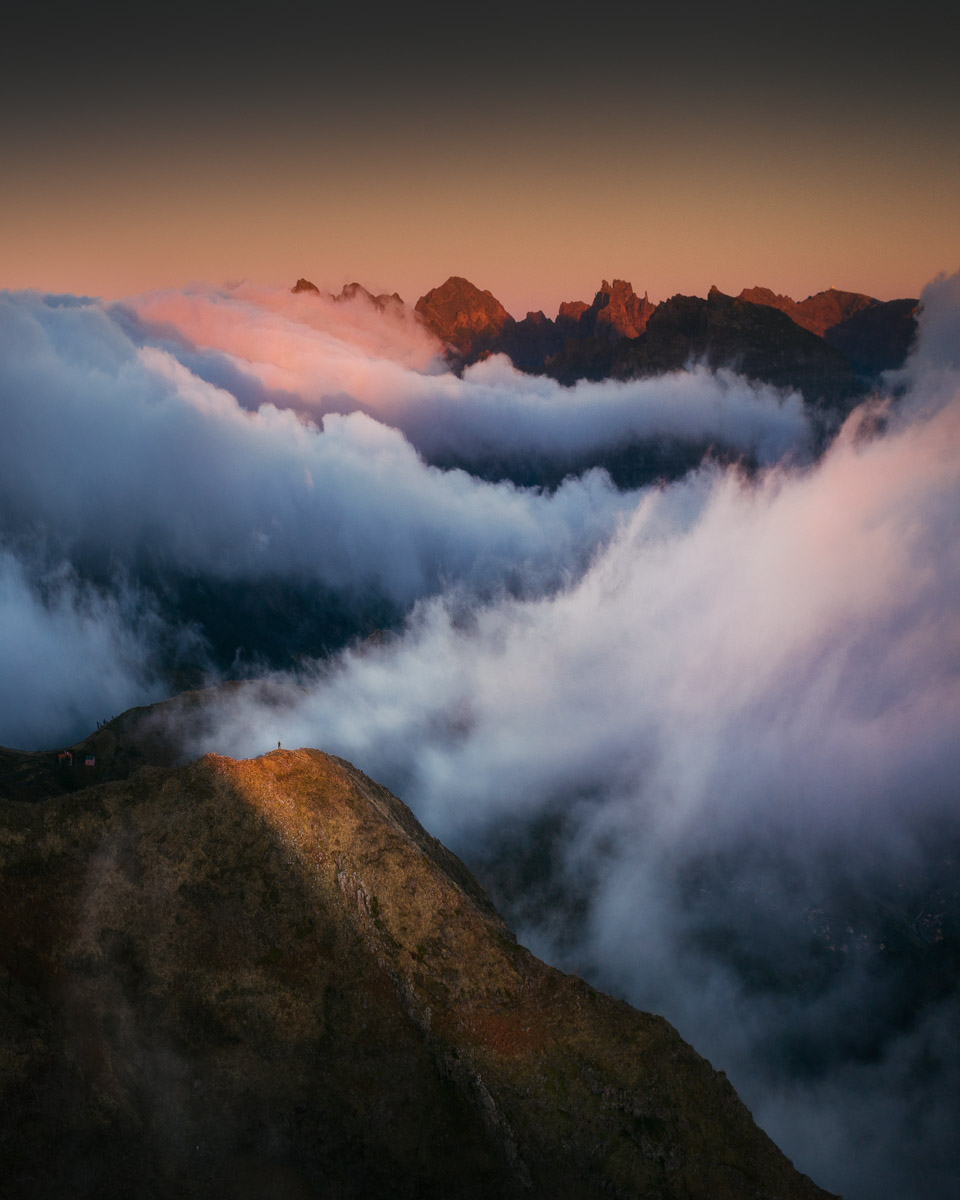
Pico do Arieiro
Pico do Arieiro is the third highest peak on Madeira and the most easily accessible, as you can drive right up to it. It was one of the first places I photographed after arriving on the island and remains a favorite. Pico do Arieiro is incredibly versatile, with breathtaking views in multiple directions. Located in the center of the main mountain range, it offers several nearby viewpoints that you can easily switch between depending on the weather conditions.


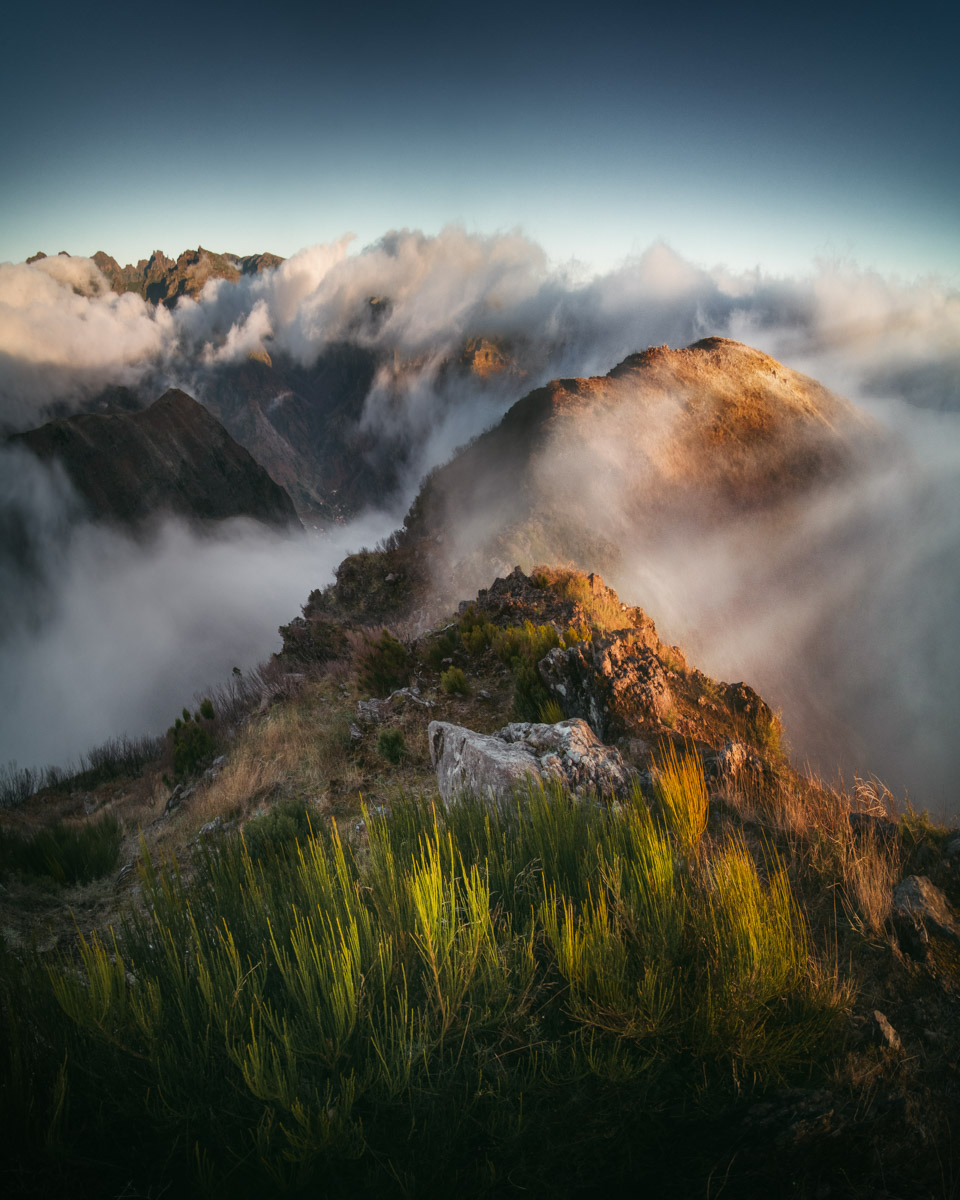
Pico Ruivo
Pico Ruivo, the highest peak on Madeira, is another excellent photography location with stunning views of the surrounding mountain range. There are several viewpoints at Pico Ruivo that offer different perspectives. Additionally, the trail to Pico Ruivo has its own photography spots.
The Pico do Arieiro to Pico Ruivo trail features an impressive staircase that appears to lead to heaven when viewed from the bottom. Due to the constantly changing weather in the mountains, this spot can offer a unique photograph every time you visit. When the clouds are low, it can seem as though the stairs will take you to the universe, while clouds rolling over the ridge create a wild and dramatic scene.

Miradouro do Guindaste (Crane Viewpoint)
Miradouro do Guindaste, also known as the Crane viewpoint, is a magical coastal sunrise location on Madeira. Located on the northern part of the island, it offers a stunning view of the Penha D'Águia rock in Porto da Cruz and the rugged cliffs of Madeira. The headland is a great subject for photographers and a perfect spot for an Instagram shot. The golden light of sunrise adds to the mesmerizing beauty of the viewpoint. Miradouro do Guindaste is also a good option for watching the sunrise if it's too cloudy in the mountains.


Miradouro Lombo do Mouro
Lombo do Mouro is a viewpoint located on the island of Madeira, known for its breathtaking views of the surrounding mountains and valleys. From here, visitors can see the clouds blown in by the trade winds as they flow over the Encumeada.

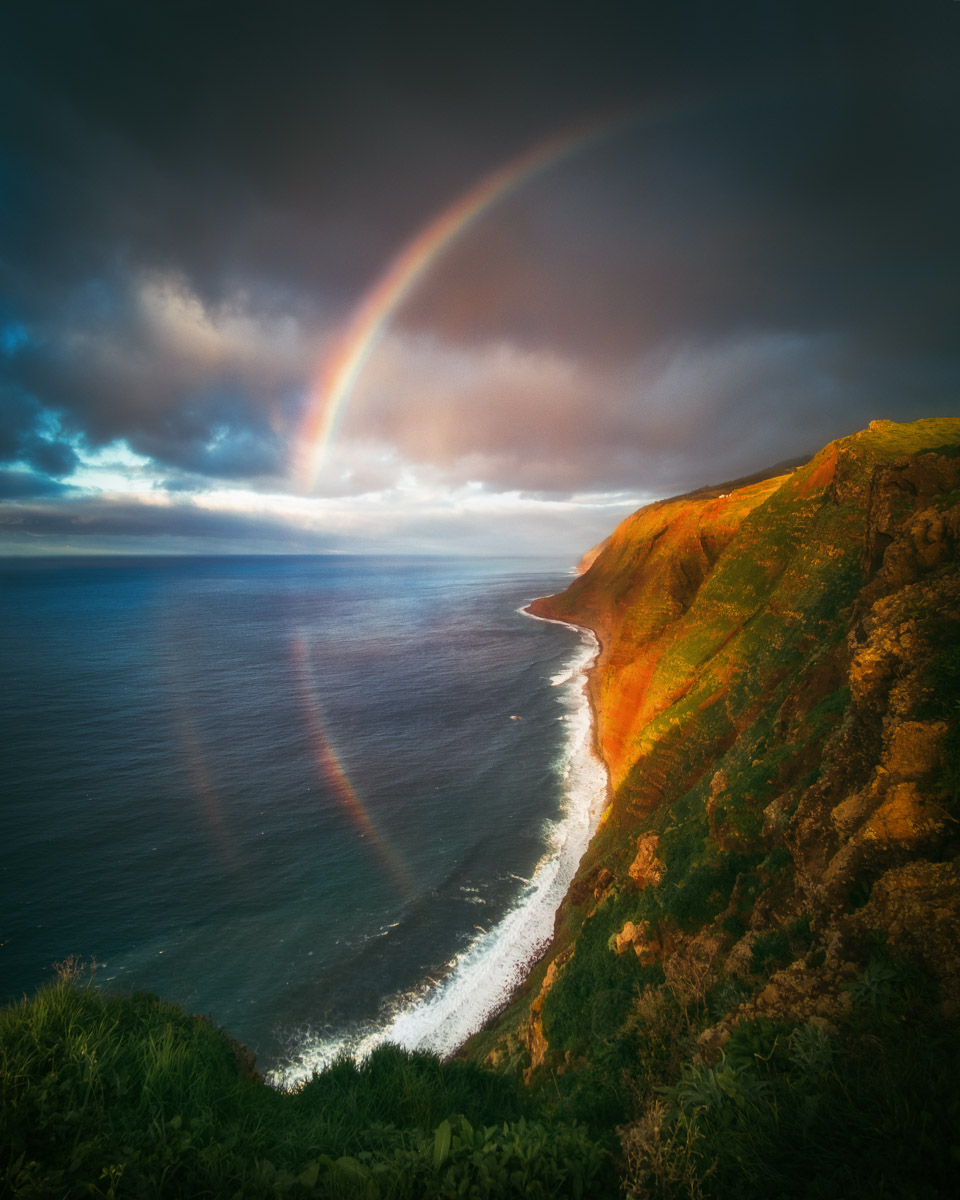
Miradouro do Fio
This viewpoint offers breathtaking views of the rugged coastline and the Atlantic Ocean, with the opportunity to spot a variety of seabirds and possibly even whales and dolphins. The winding road leading up to the viewpoint is surrounded by lush vegetation, including Madeira's famous laurel forests. The Miradouro do Fio is a must-visit destination for anyone looking to experience the natural beauty of Madeira.


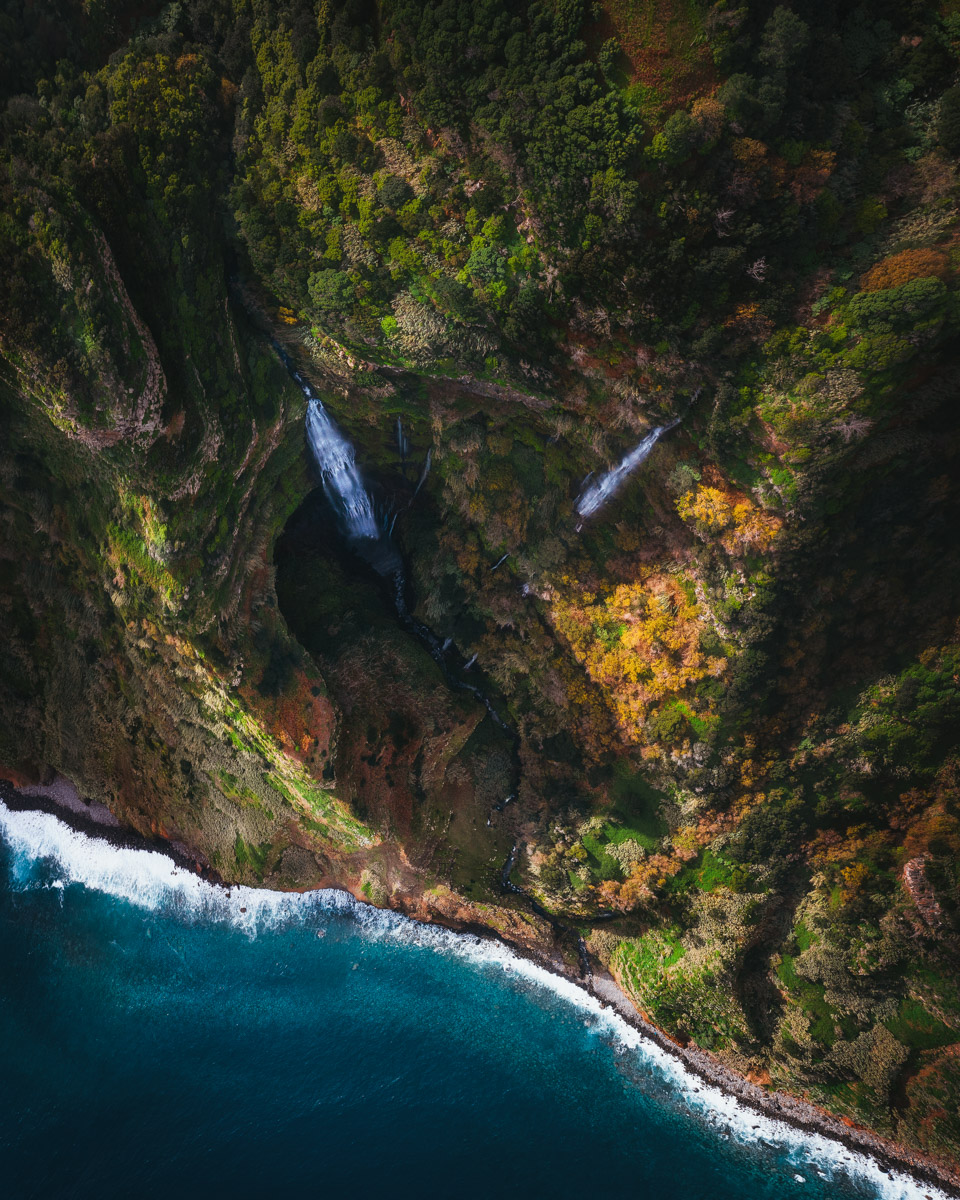
Garganta Funda waterfall viewpoint
Garganta Funda waterfall in Ponta do Pargo is a beautiful waterfall on Madeira with a kettle-shaped rock formation and stunning views of the Atlantic Ocean. It's a great spot for flying a drone to get a higher perspective or for capturing with a traditional camera. However, keep in mind that the waterfall will not have any water flowing during the summer months. The water flow only increases after several weeks of heavy rain.


Porto Moniz
Porto Moniz is a small town on the northwest side of Madeira with several interesting photography locations. The natural swimming pools in Porto Moniz are a popular spot for photography and a great place to relax on a sunny afternoon. Even if your significant other is not interested in photography, they are sure to enjoy the peaceful atmosphere of the pools.
When to Go to Madeira
Madeira enjoys a warm, pleasant climate all year round, earning it the nickname "the island of eternal spring." While the winter months (November to February) can be cooler and wetter, they are still pleasant. In terms of photography, the summer days are longer but can be very hot, with many waterfalls drying up. On the other hand, winter is less crowded and offers the opportunity for dramatic skies, but the weather can be unpredictable. For these reasons, autumn, spring, or even winter might be the best choices for photographers looking to capture the full power of the island's waterfalls and enjoy lower prices and fewer crowds.

Synology NAS - An ideal storage solution for photographers
Have you ever connected a hard-drive to your PC only to find out it turned itself into a brick? If your answer is no, you can consider yourself a lucky person. Several of my colleges lost data to broken hard-drives and I can assure you, they are no amateurs in the field of photography.
Most questions I receive relate to photography equipment. Fans all around the world want to know how I use my camera, tripod and lenses. I patiently answer these frequent questions but I have to say that nowadays, you can make a great photo using a common cell phone.
However, over the years I found a different piece of equipment even more essential. When you finish reading I would like you to evaluate your current stand and ask yourself what you could do to prevent loosing files, a true photographer’s nightmare.
Have you ever connected a hard-drive to your PC only to find out it turned itself into a brick? If your answer is no, you can consider yourself a lucky person. Several of my colleges lost data to broken hard-drives and I can assure you, they are no amateurs in the field of photography.
I was looking for a solution to my storage and back-up problem for more than a decade and finally I managed to find a product I can depend on. After a thorough testing I would like to share my opinion on a storage made by Synology, which became an integral part of my photography process.
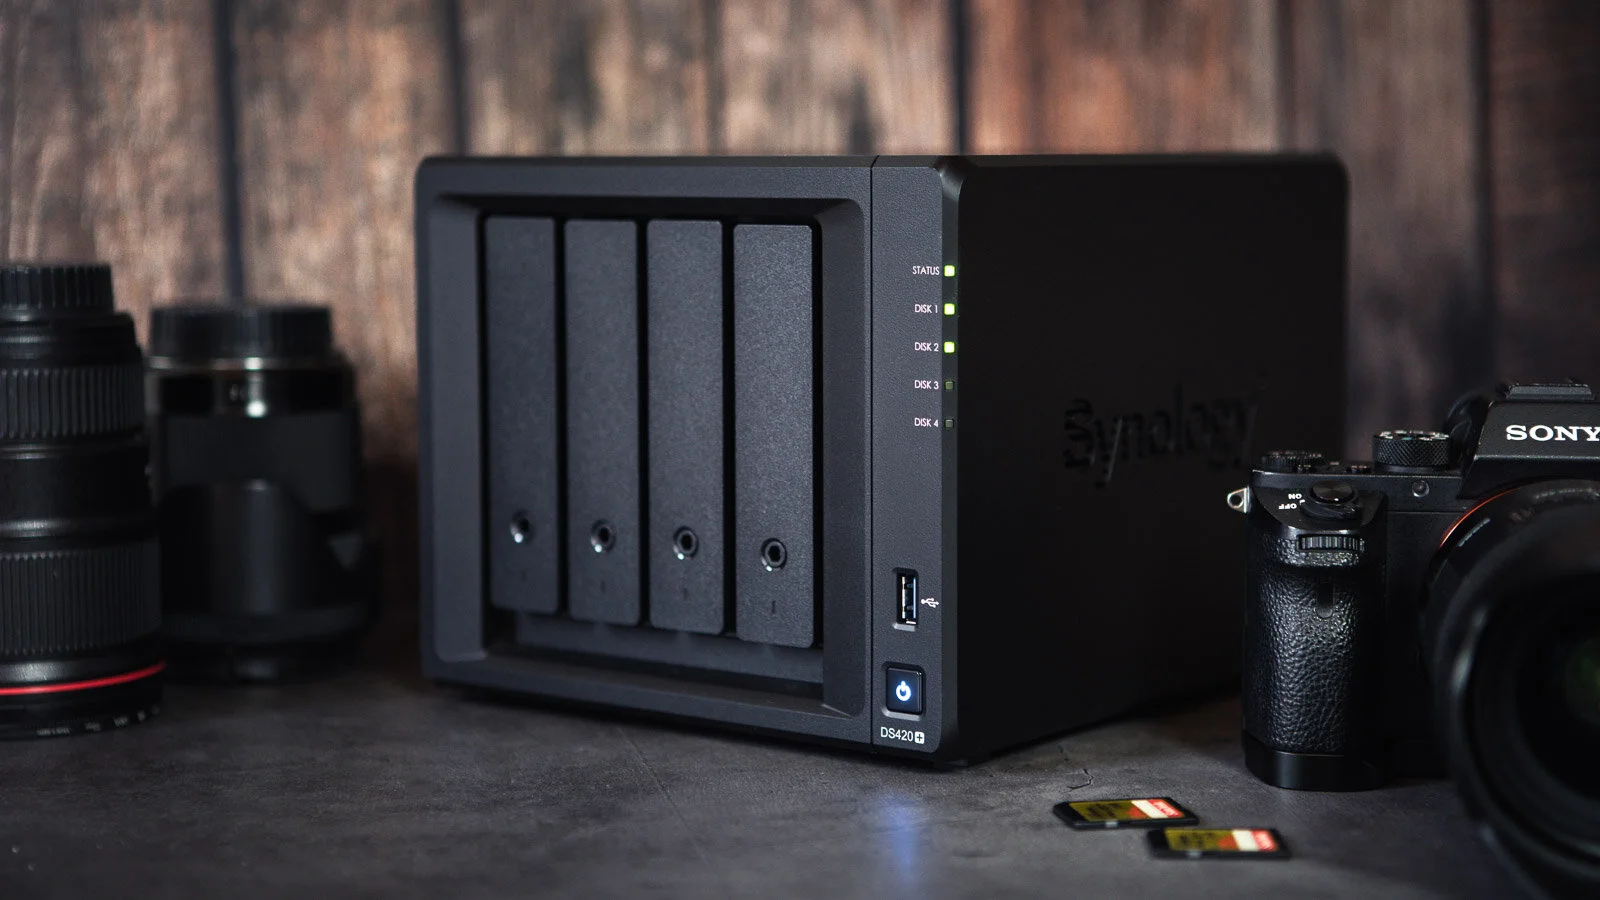
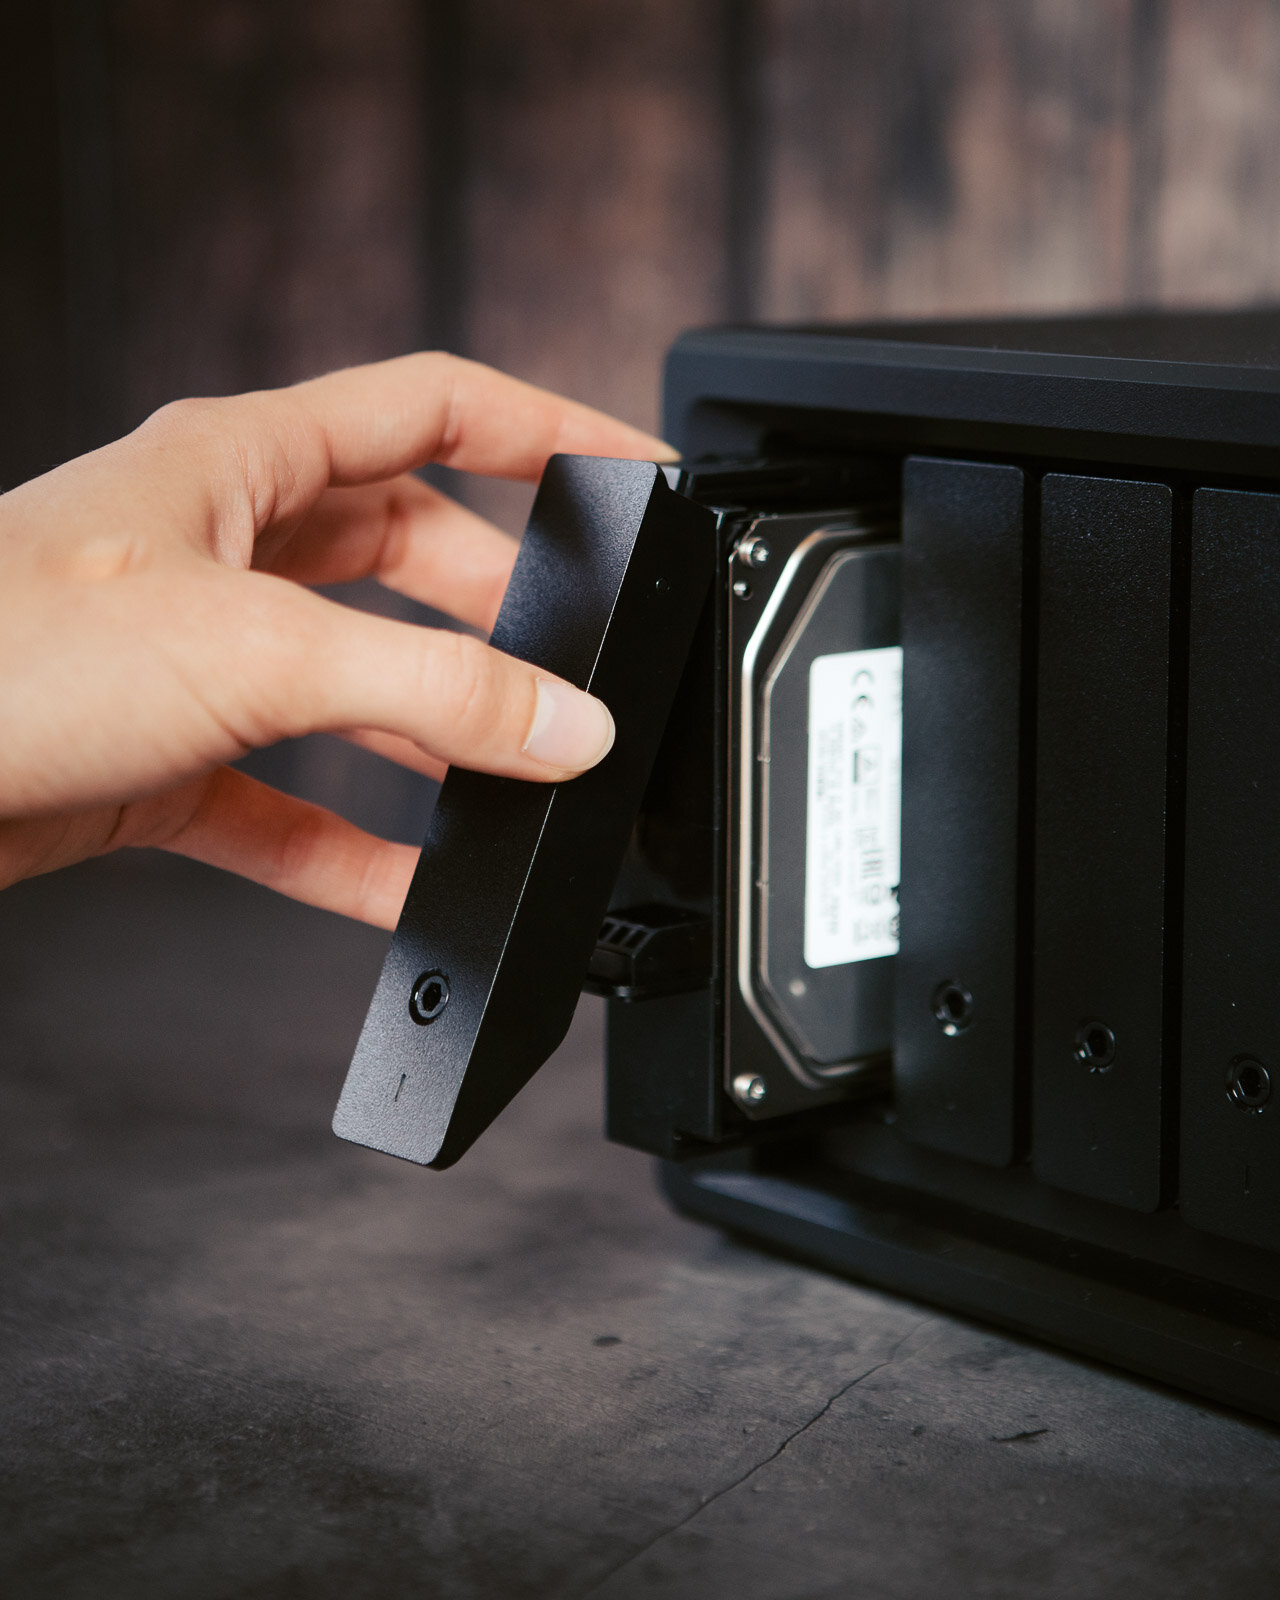
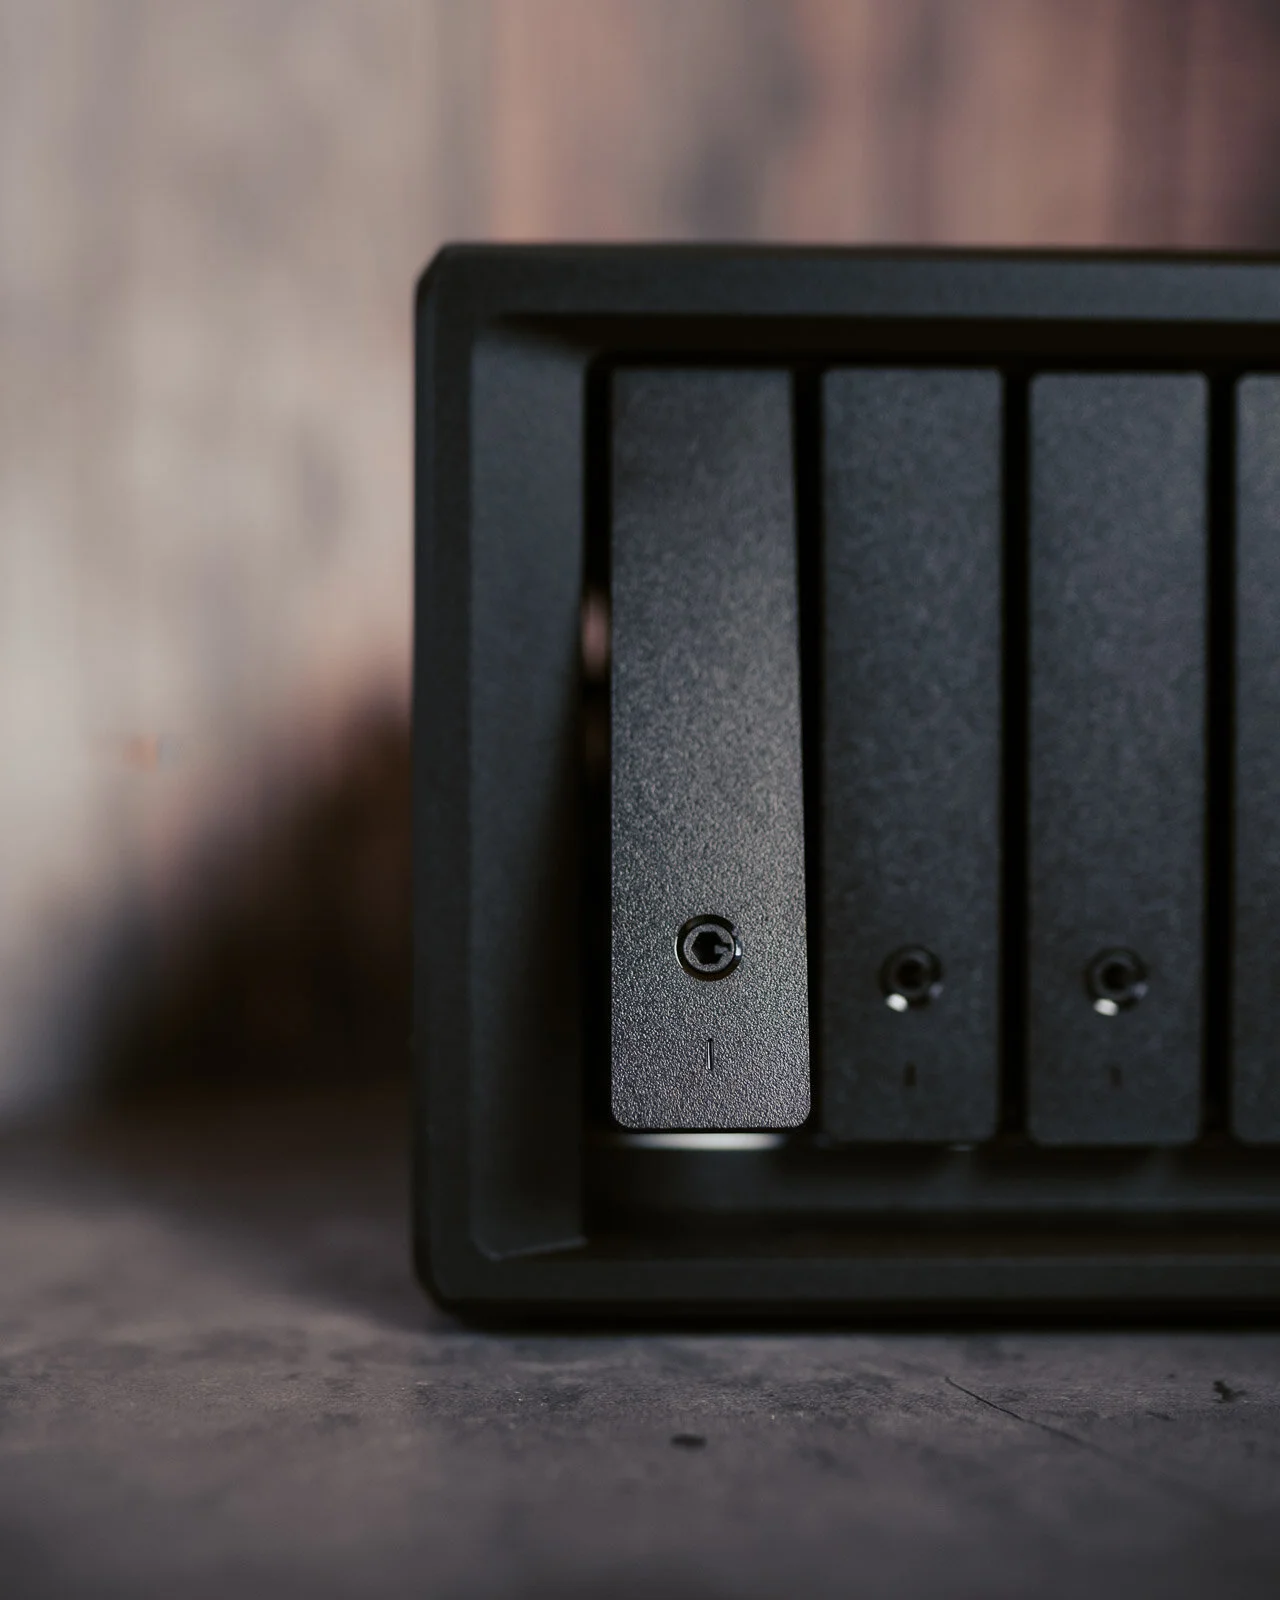
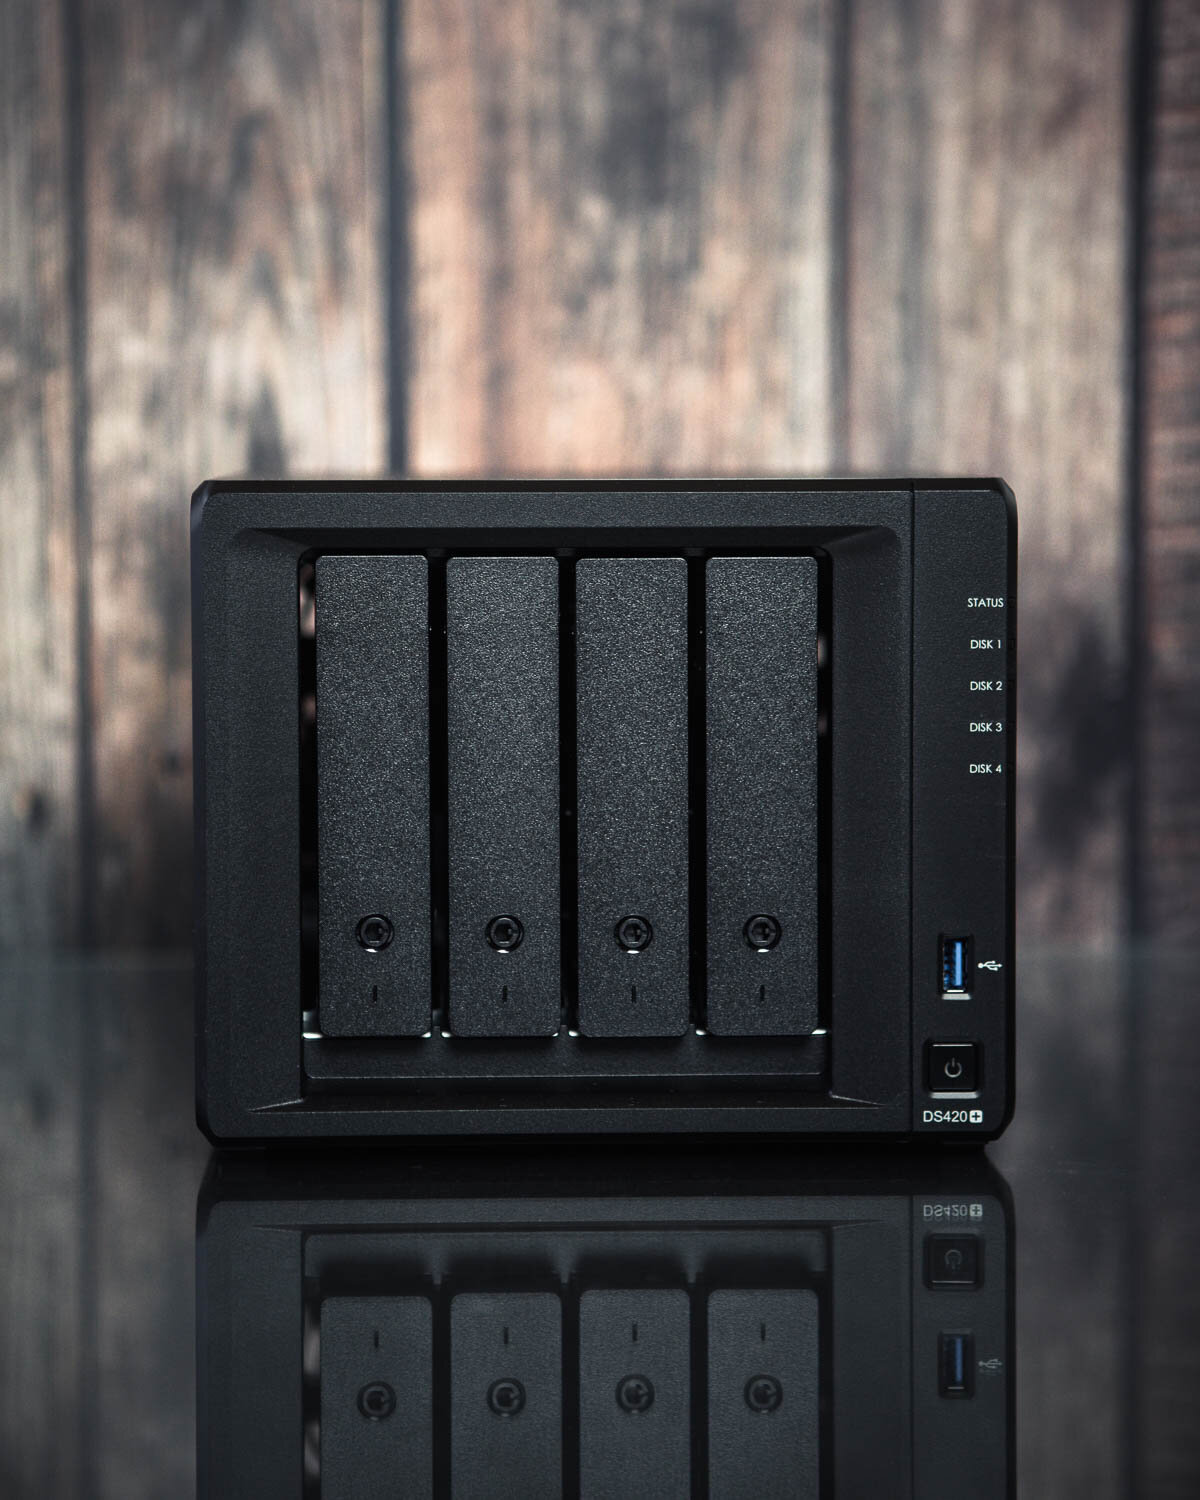
My Synology setup
Sitting on my table is Synology NAS DS420+ together with HAT5300 8TB+ hard-drives. NAS (Network Attached Storage) represents a smart data storage consisting of hard-drives connected to a network, making the files accessible from different devices, such as smartphones, tablets and PCs. NAS is a unit with its own CPU and RAM, which means it protects my data but also enables a quick and easy access from anywhere I need.


Technical specifications
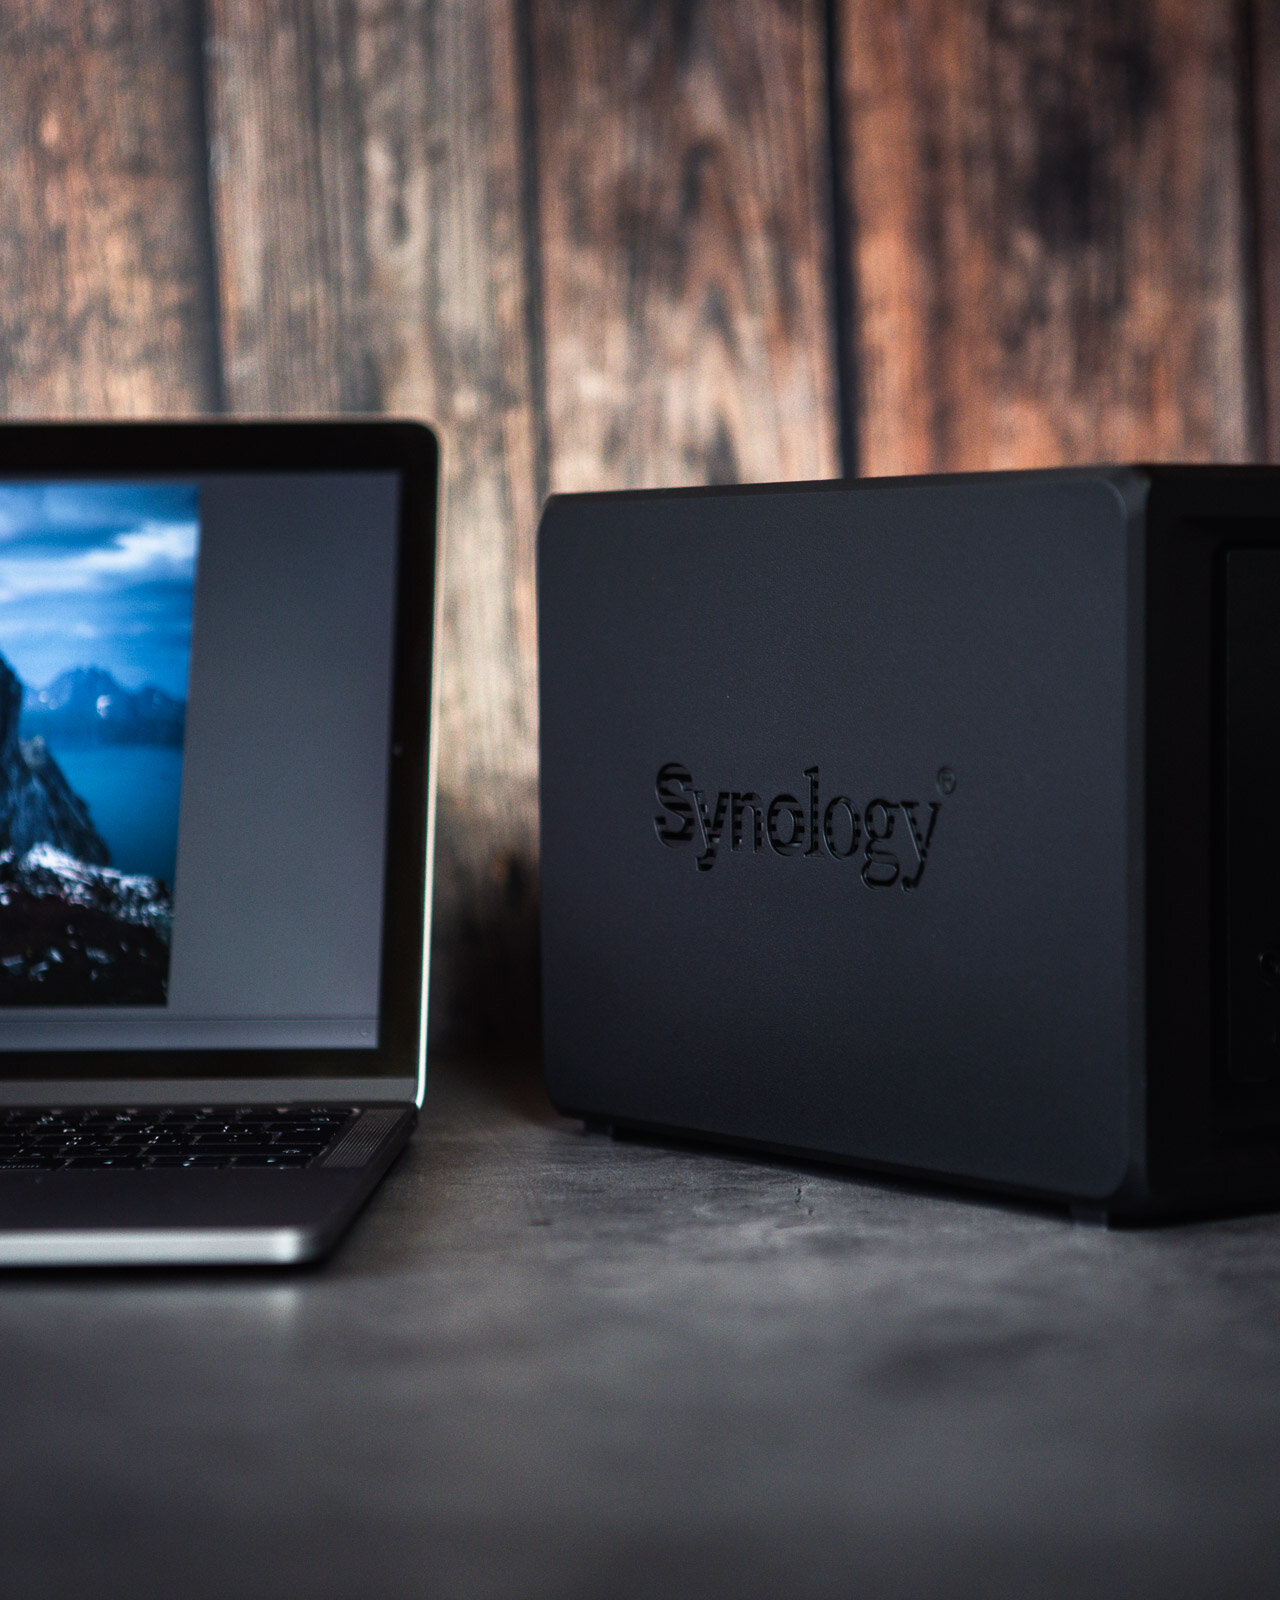
Synology advertises their NAS DS420+ as a device designed for IT enthusiasts and home users. I would like to add professional photographers to the list.
Great advantage of this setup is a dual-core CPU clocking at 2.0GHz (2.9GHz Turbo Boost) which allows fast and fluid manipulation with large volumes of data. Every photographer knows how important this is. Another advantage is a pair of M.2 NVMe SSD slots which allow use the cache to its maximum potential.
Special utilities
Synology DiskStation Manager operating system hides a great deal of utilities. When I first got my hands on this Synology device I immediately backed-up files from my PC, phone and hard-drives. I set my Mac to back-up the data automatically, so all my data are stored safely and I don’t have to do anything else.

Synology DSM 7.0
Synology Disk Station Manager (DSM) has been evolving steadily since it was released. The new version Synology DSM 7.0 is much faster, modern, and comes with some new and enhanced apps. One of them is the all-new Synology Photos. The app combines Photo Station and Synology Moments to provide a unified platform to manage your photos.

Synology Photos - All-in-one photo management
The new Synology Photos is designed for both professional photographers and casual users. The app offers all the tools you need to manage your photos. You can easily group, filter, organize and share your content (both manually and automatically). It also ensures that your content is safe and secure. Synology Photos backs up and organizes all photographs from my cell phone, so I don’t have to limit myself with its capacity. User environment is arranged systematically and intuitively. It places the photographs into a time-line which can take me back to my favourite memories anytime. Aimed to be used by professionals, it allows you to share photographs via direct links, offers advanced sorting options, and much more.
I used Synology Moments before. Compared to both Photo Station and Moments, I found it to be much faster and responsive. The new app has also a better-looking and minimalistic design.
Synology Drive
Synology Drive is a private cloud I grew accustomed to use every day since it’s free for all who use Synology devices. This allows me to access my data anytime, from anywhere and using almost any device. Synology Drive is also accessible via cell-phone app. All the data is encrypted using SSL protocol.
My workflow
If the situation allows it and I have my PC and Lacie hard-drive with me on my travels, I create the first backup right after I return from a photoshoot. After returning home I immediately upload all the files onto Synology. The system automatically mirrors the files onto the second hard-drive running in RAID 1. Synology also allows uploading the files onto Dropbox or iCloud.
NAS had also made sharing the photographs a breeze. I can share the final product with a client via a simple direct link to my private server. I can now share without using web storages, such as WeTransfer or other. Thanks to Synology I can save a tens of minutes in this process.


Together with @evewithcamera we use this system to its maximum. Thanks to Synology Office we can easily share clouds, move large files between one and other and work on an order together without constantly ex-changing hard-drives. Productivity at its finest
Smart Home
In this last paragraph I will deviate from the topic of photography and talk about using sinology in a smart home setup. I travel a lot and therefore find a connection to my data storage and other devices at home crucial. Thanks to NAS I can tune into CCTV monitoring and manage other smart home devices from anywhere in the world. Synology DS420+ is a perfect solution for a thorough home back-up thanks to its external hard-drive and cloud. A welcomed addition to any household, in my opinion.


I use Synology NAS DS420+ daily, both in professional and private application. I consider it a versatile and smart device capable of more than just data back-up. This state of the art technology ensures safety of my data and allows me to focus solely on my creative process.
Purchasing NAS is not a small investment, but makes a perfect sense both for creators and households. It brings freedom and a possibility to transition from traditional, often faulty hard-drives. In addition, it brings dozens of utilities and functions for safe-guarding data, and makes a day-to-day life much easier.


This article was created in collaboration with Synology. I would like to thank them and I wish them even more satisfied customers like me. You are doing a great job!


Beginners Tips for Night Sky and Star Photography
The photos of the night sky have always fascinated me from my childhood. I was just lying on the rocks, staring at the shimmering sky and counting the falling stars.
Raise your head and let yourself be carried away by the shimmering glow of the night sky.
The photos of the night sky have always fascinated me from my childhood. I was just lying on the rocks, staring at the shimmering sky and counting the falling stars.
It took a long time for me to capture the heavenly beauty in photos. Shots of Milky Way are still not very common as they cannot be taken simply by pressing the shutter button. Some effort is needed.
I would like to bring the night shots closer to enthusiasts without professional ambitions and show that this is certainly not as unattainable as it may seem.
The camera opens our view into the distance and allows us to see more than is possible with the naked human eye. I will show you step by step how you can shoot stunning pictures of the starry sky by yourself.
My favorite photo of our galaxy (the shot below) was taken in the Arches National Park. There are stars brighter than you can ever imagine. To get the same results, I have prepared the most important information for you. Let's do it!


Equipment required
It won't work without a quality digital camera. Night photography requires a more skilled machine with Manual mode. Equally important is the lens with a good aperture. Personally, I like wide glass that can capture the whole starry spectacle.
What camera gear do I use for astrophotography?
My favorite setup for astrophotography: Sony FE 16-35mm f/2.8 GM or Samyang 14mm f/2,8.
Remember to charge the batteries and possibly pack many others.
Necessity is a solid tripod that does not break any wind or uneven terrain. If you ask about my beginnings, yes, a car roof or a tree stump can also be used.
If you're serious about shooting stars, get a remote control. This will prevent camera shake after pressing the shutter button.
Remember to take a flashlight, preferably a headlamp. A courageous partner is also very important to me. Choose someone who is not afraid of the dark, will be a pleasant company or even part of the picture. During colder nights, you will be happy with thin gloves, a hot thermos of tea and something good to eat when you will be waiting for the clouds to leave.
Good preparation avoids disappointment
Clear nights are very cold, but the more brilliant photos are worth it.
There is a simple rule: the darker area and the sky (without the moon) the clearer and more colorful the photo of the Milky Way.
If you choose the Milky Way as the main object of your shot, try to compose it in the middle of the scene.
Often a pure sky shot is boring and generic. Find a place with a beautiful silhouette for the foreground, a beautiful tree, a lake (reflection) or even an interesting building.
Just like the moon, the stars move over the night sky and thus not all-star pictures are always visible.
There are very good free apps like SkyView® (iOS / Android) that project the starry sky in real-time through the camera and specify locations of the moon, sun, planets, and satellites.
So you succeed in an impressive composition even without astronomical expertise.
The stars and the Milky Way are most visible during the summer months.
The optimal location for clear stars
The fewer light sources near the camera, the better. Optimal places to photograph the starry sky are usually elevated - on a hill or mountain, on which there are no other light sources. The area near large cities is usually unfavorable, as a city with its thousand lights, can emit light over several hundred meters.
Fortunately, there are a lot of helpers.
On the following websites, you can see the map of the light pollution from any different places to quickly find a dark location: www.lightpollutionmap.info or www.darksitefinder.com/maps/world.html
In addition, there are cool apps called Sun Surveyor or PhotoPills, with which you can determine for a specific location, where the stars, moon or sun at any time. With this or other tools, the shoot can be well planned and you be able to find an optimal time.
Find more about the helpers: 6 BEST APPS FOR NIGHT PHOTOGRAPHY
QUICK CAMERA SETTINGS:
manual mode M
aperture as low as possible (f/1.4 or f/2.8)
higher ISO 3200 - 6400
exposure 20-30 seconds
ISO
The value between 5000-6400 is necessary so that something good can be seen in the picture. If the ISO value is too high, a grainy picture appears, on which the stars can no longer be distinguished from the noise.
Good post-production also plays a role in star photography. Stay tuned! :)
If you have any unanswered questions, leave me a comment. Good luck and feel free to share your creations with me.

The Himalayas - Manaslu Circuit in Nepal
The Manaslu Circuit is one of the most beautiful but the least visited in Nepal. Have a look at this blog and discover the Himalayas with me. It will take you to the rugged Nepalese mountains and diverse vegetation, along with you ascend to Larkya La Pass at 5125 m.
The Manaslu Circuit is one of the most beautiful but the least visited in Nepal. Have a look at this blog and discover the Himalayas with me. It will take you to the rugged Nepalese mountains and diverse vegetation, along with you ascend to Larkya La Pass at 5125 m.

Mt. Manaslu, 8,163 metres (26,781 ft) above sea level.
I went to Nepal at the end of March 2019. It was one of the most unforgettable and roughest journeys in my life.
I chose Trek Manaslu Circuit for several reasons. It is one of the least explored routes in Nepal, it is physically demanding and requires a special permit. Due to its close proximity to Tibet, the whole area has been closed to tourists for a very long time and today the trek is only accessible with a local guide. This distinguishes it from many other local treks. Only less than 2% of all tourists visit Manaslu Circuit every year. Most of them go to Everest Base Camp or to Annapurna Circuit. Trek goes around Mt. Manaslu (8163 m), the eighth highest mountain in the world and it is undoubtedly one of the most adventurous journeys in the Himalayas. The highest point of the trek is Larkya La Pass (5125 m), one of the most dramatic passes in Nepal.


My camera gear to Nepal

Before traveling, it is important to keep in mind that if you do not pay for the carrier (sherpa) but only the local guide, you will carry all the equipment on your own back. A 6-7-hour walk in challenging terrain awaits you daily. Most tourists carry about 12 kg, but the profession of photographer brings extra kilograms. Consider that only a tripod weighs almost 1.5 kg. I had Sony A7Rii with only one lens, an excellent Sony 16-35 f/2.8 GM. I had also new Huawei P30 Pro that offers a system of four Leica cameras with 5x optical zoom so I didn't have to carry several other lenses with me. The next 7 photos below this paragraph were shot on this phone.
I have often photographed even at temperatures -12°C and this is not, of course, good for all batteries. High in the mountains there is a problem to charge anything. It is essential to keep your phone and all batteries at your fingertips, warm, during the trek.

Birendra Lake (Birendra Tal), Manaslu Glacier in Gorkha District.
The beginning of the journey
The adventure begins with an 8-hour bus ride from Kathmandu to Sotikola. With a greater dose of imagination, the road can be called a road. In Sotikole we start out on a walking path. For the first few days, it slowly rises through a deep valley upstream of the Buri Gandaki River. The appearance of nature changes rapidly, the green vegetation ends and you suddenly find yourself in the middle of a landscape full of glaciers and massive walls of seven thousand peaks. In the village of Shyala, breathtaking snowy scenery finally opens and you see the peak of Manaslu.

The highest point - 5125 m
Really difficult part of the trek starts from the village of Samagoan (3450 m), where you can see the frozen lake Birendra. The biggest challenge comes on the day of the ascent to Larkye La Pass (5125m), the highest point on the trek. Much of the pass is covered with ice and snow all year. It is necessary to come before the wind rises and the summit suffers from fog or snow. But it is not the only thing. Sunlight also increases the risk of avalanches falling. The guide said that there was the most snow in the past 20 years.


The alarm clock rings at 3 o'clock, at half-past four, we head towards the pass. Three hours in the dark with a headlamp, in the snow and up to a steep hill. When I think my adrenaline can no longer rise, there is a roaring sound of a falling avalanche about 200 m ahead. It is an unforgettable feeling of fear, but a great sense of happiness. The white snow dust has covered the pass. Our guide again considers returning, but this time we decide to continue. The fog is denser and denser, and we approach the summit of 5125 m. On the way, I take some pictures of the sunrise, but then I concentrate on walking and keeping my hands warm.

After less than six hours we reach the summit, unfortunately, the fog is so dense that it is impossible to see one step. We are incredibly lucky, the next day the pass is snowed and closed to all hikers. A very steep descent of a snow-covered path awaits us down the pass. The rocky landscape turns into subtropical vegetation. You walk through the beautiful forests of rhododendrons, pines and junipers. As you descend, you pass terraced rice fields, wild horse meadows, and deep bamboo forests. The journey ends in the village of Dharapani, after that we have almost a 9-hour drive along the dirty road back to Kathmandu.


Back to reality
We made the Manaslu Circuit in 10 days, climbed 8000 meters and saw some of the most beautiful sceneries along the way.
After so many days we are back in civilization. You enjoy the feeling of happiness from a hot shower, and you are not able to respond to dozens of messages and e-mails after connecting to wi-fi. You find yourself back in a reality full of rush and worry.


For me personally, it was one of the longest and toughest journeys in my life. „The way is the destination“ had the right meaning here. I had the opportunity to see the peaks of snowy mountains, massive waterfalls, suspension bridges and the diversity of untouched nature. But it was not just about the natural beauty of the Himalayas. Staying in Nepal has shown me a hard-to-understand lifestyle for Europeans.
Nepal is one of the poorest countries in the world, but people still look happier there than most people in Europe. However, happiness is very relative in Nepal. I've met the friendly villagers, many amazing people and I really wish them all the best in their lives. Living in Nepal is not easy.

In mountain villages, you feel that the time stands still, the values and priorities flip upside down and the majestic mountains enchant you with their power and energy.
See you the Himalayas! It was a great honor.

THE MAJESTIC LANDSCAPE OF MADEIRA
The island comprises of stunning natural scenery, beautiful wild landscape, glittering waterfalls, dramatic coastline, and high mountains. Madeira is not the place for the beach lovers, but for the outdoors enthusiasts and especially for landscape photographers.

The island comprises of stunning natural scenery, beautiful wild landscape, glittering waterfalls, dramatic coastline, and high mountains. Madeira is not the place for the beach lovers, but for the outdoors enthusiasts and especially for landscape photographers.
Download the Complete Travel Guide
to Madeira Islands
Over 320 points of interest on Google Maps app
INTERACTIVE MAP OF MADEIRA ISLAND

I spent in Madeira 10 days in June 2019. Let's explore some of the best places to see. The world's largest laurel forest, dramatic rock formations, colorful reefs, and many other interesting locations that are an unforgettable experience. Madeira is a popular destination and indeed there are many famous photography spots. The biggest part of Madeira is still very quiet and undiscovered so I really enjoyed it and I'm going to come back next winter. You have to do more steps to get to know the more authentic side of Madeira.

You should definitely go to the middle of the island and see sceneries like Serra de Agua, Laurisilva of Madeira, Levada dos Tornos or beautiful area of waterfalls Levada of 25 Fontes.
Let's take a look at some other great places to see:
Pico do Arieiro (1818 m)
It is not possible to visit Madeira without seeing one of its peaks, this is the third highest and also one with the best view even in bad weather. It is very cold here, remember that the mountains in Madeira can be cooler even in summer. I also climbed the peak of the Pico Ruivo (1862 m), which offers a bird's eye view of Madeira.
Porto Moniz
The biggest attraction in the west of the island are natural lava pools. The pools are also very photogenic so you may know lots of images from this place. When I visited this place, all the pools were closed because of strong waves from the ocean.
Ponta de Sao Lourenco
This location was definitely my favorite one in Madeira. While almost the whole island abounds in lush vegetation, this part is very dry. Only in the winter months there are blooming plants. That was the main reason why I visited Madeira in January. It was an unbelievable moment to see the sunrise at the easternmost spot of the island, Pico do Furado.

Madeira is a beautiful and fascinating island that makes for a stunning photographic destination. My plan is to write a more detailed article about many secret gems on this magical island, stay tuned!

6 BEST APPS FOR NIGHT PHOTOGRAPHY
Are you interested in shooting stars and night photography? These astrophotography apps make shooting stars much easier. They are recommended for finding an ideal location, perfect weather conditions, identifying stars, the position of the Milky Way or the moon.
Are you interested in shooting stars and night photography? These astrophotography apps make shooting stars much easier. They are recommended for finding an ideal location, perfect weather conditions, identifying stars, the position of the Milky Way or the moon.


This article is a small part of our extensive guide: Beginners Tips for Night Sky and Star Photography.
Dark Sky Finder
Light pollution is a major problem in photographing stars. This app will help you find the darkest spot for observation. Users add their favorite places along with notes.
Weather Underground
This is one of the most accurate predictions. When it says it will rain in 20 minutes, it rains in 20 minutes. What makes the app special for us? You can set your own specific notifications. If you are waiting for the fog after the rain, simply set the alert.
Deluxe Moon
This is my favorite monthly app. It offers a visual idea of how much light the moon reflects. Ideal conditions occur when the moon is new or far below the horizon. I can see exactly when this will happen.
TPE - The Photographer's Ephemeris
It is a web-based and mobile application that simply helps to outline where it will shine in a given location. You can see the light falling into place, both day and night, using the sun and moon position calculator.
Go Sky Watch
This app is great to identify stars in the sky. You can locate stars, planets or entire constellations simply by pointing your mobile phone toward the sky and rotating it.
PhotoPills
You should install ff you are really interested in astrophotography. Finding the Milky Way has never been easier. The app offers countless features that are very useful. For example, if you have a 14mm, f / 2.8 Samyang manual lens, you can use the calculator to calculate the shutter speed at aperture and ISO.


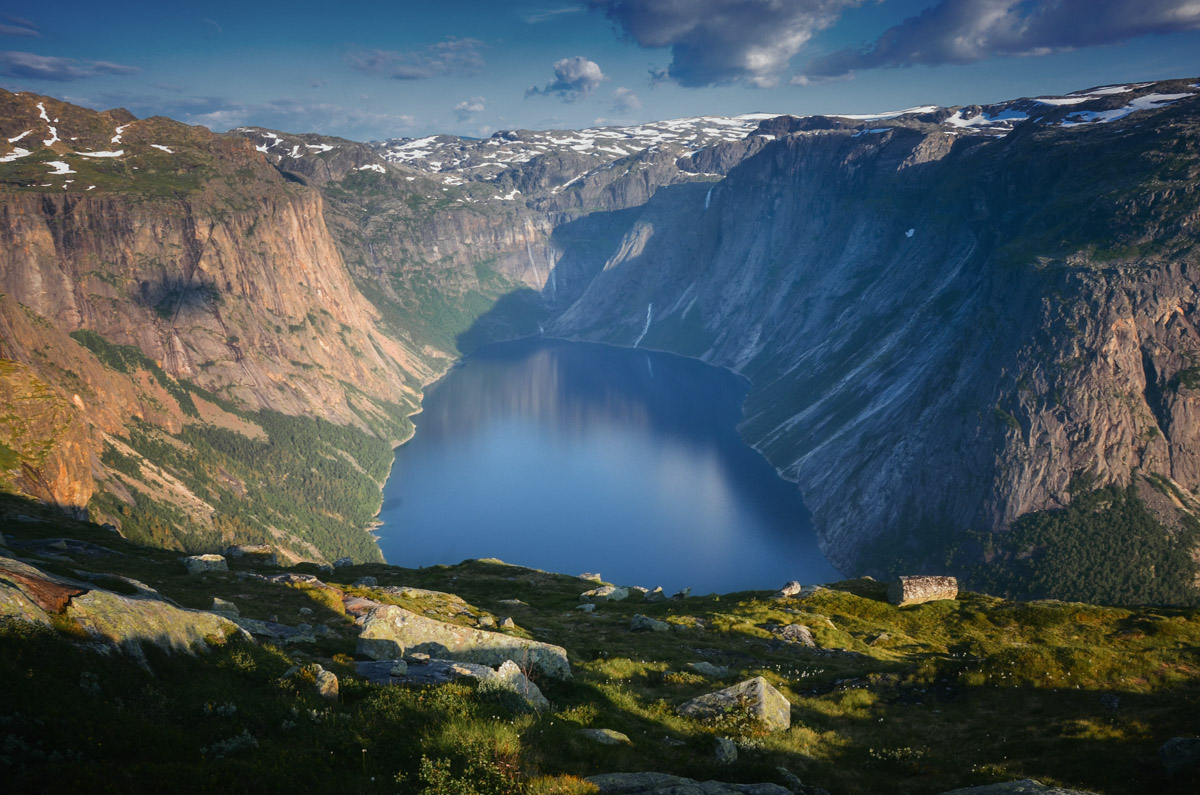
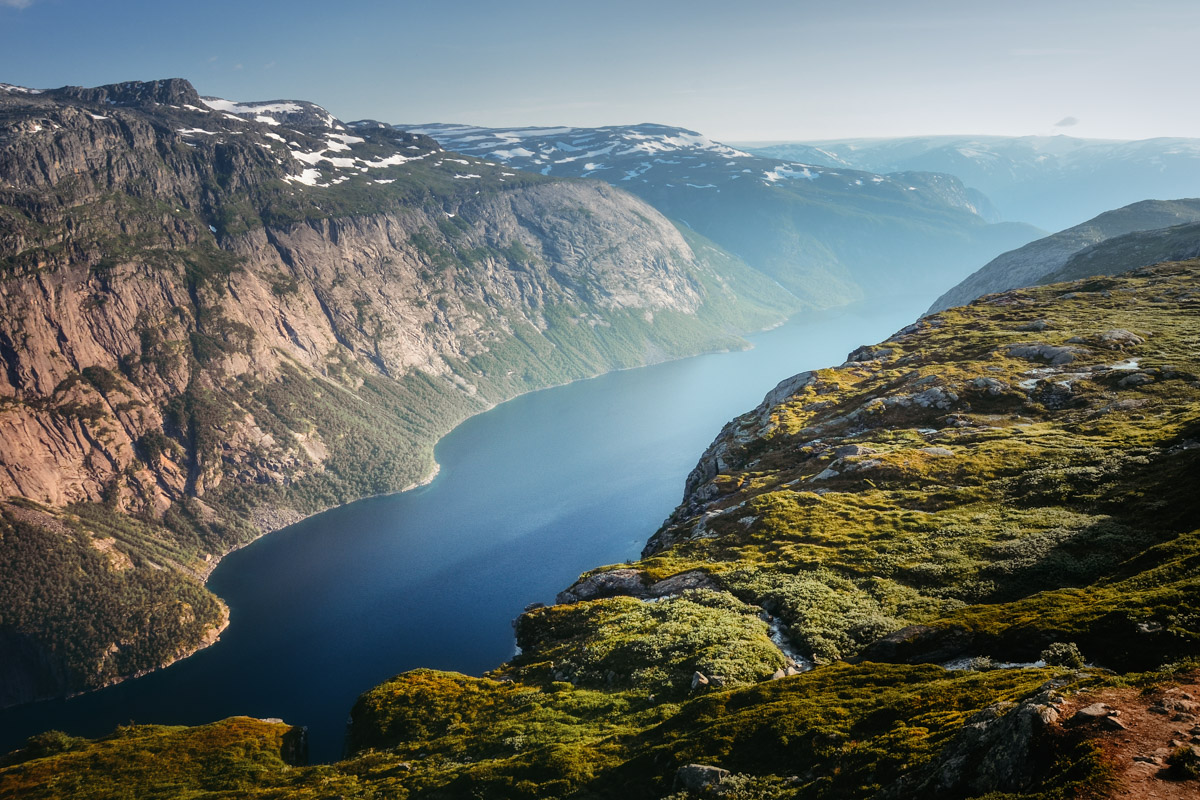
FJORDS OF NORWAY - ON THE EDGE OF THE WORLD
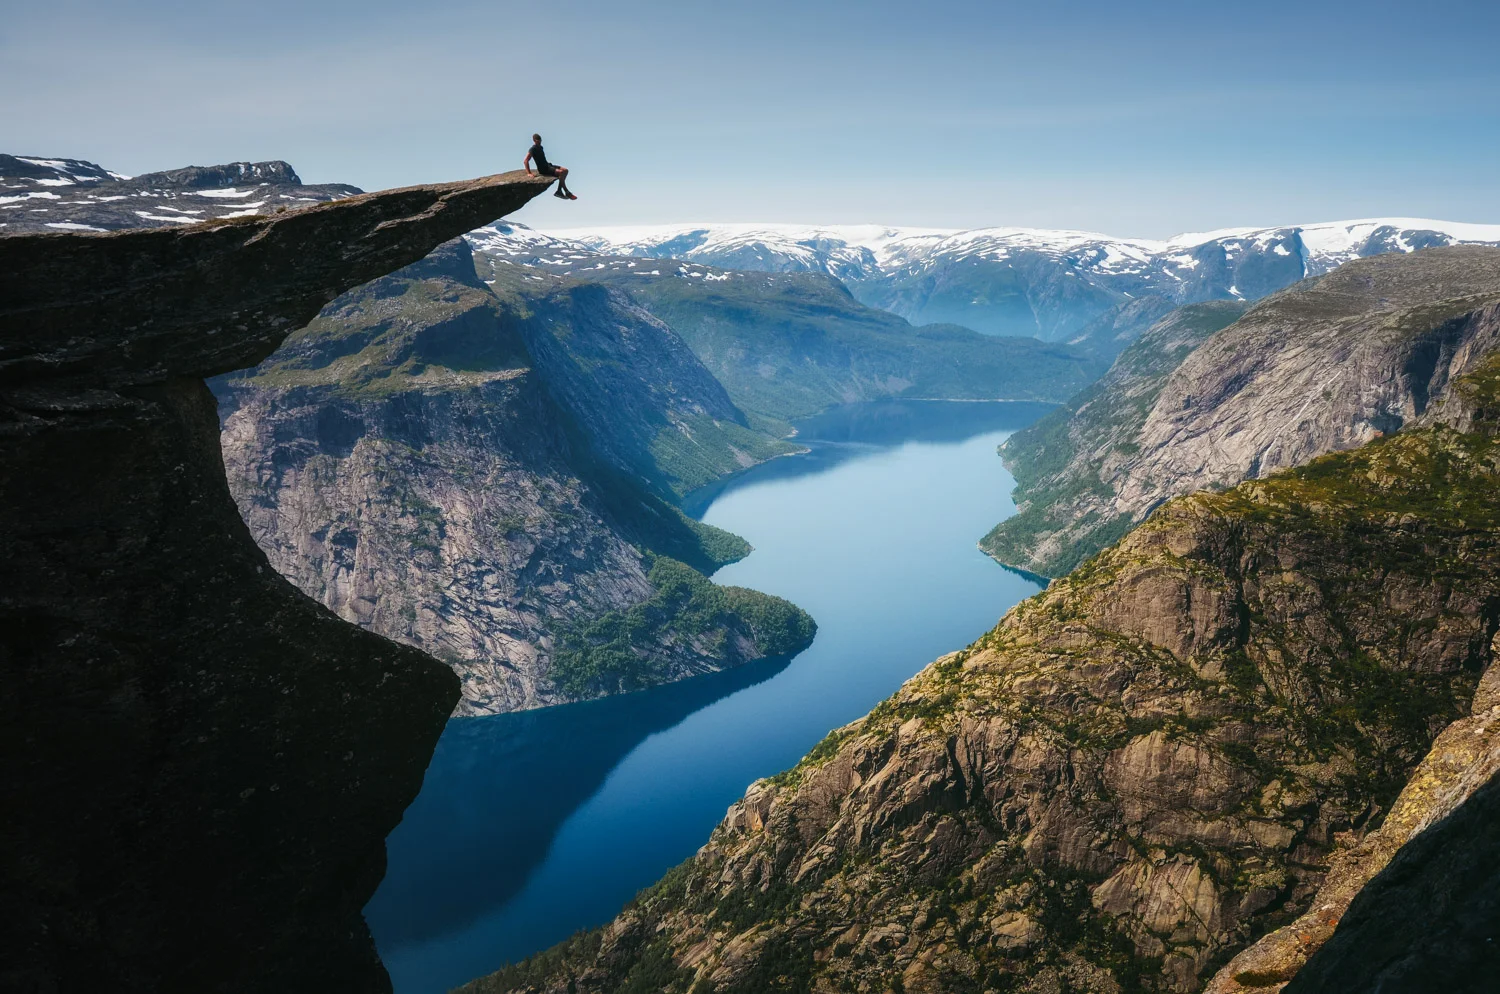
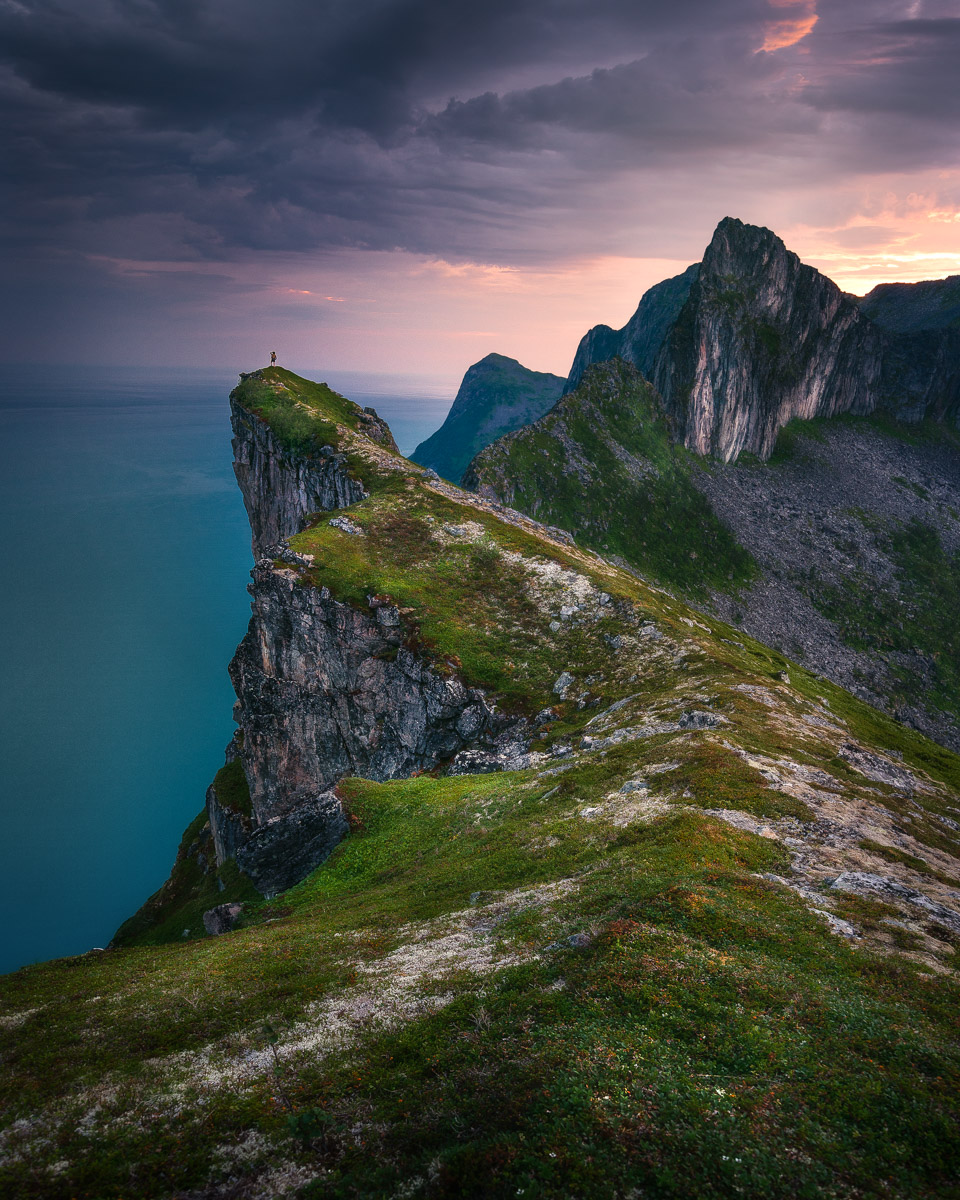
I fell in love to this feeling when you sit alone in silence and see that wonderful world. That is so unusual and breathtaking. In this picture, it is me sitting on the edge of that cliff. You can see the 700 meters drop below you, but it seems like infinity.
I fell in love to this feeling when you sit alone in silence and see that wonderful world. That is so unusual and breathtaking. In this picture, it is me sitting on the edge of that cliff. You can see the 700 meters drop below you, but it seems like infinity.

Trolltunga - On the edge of the world
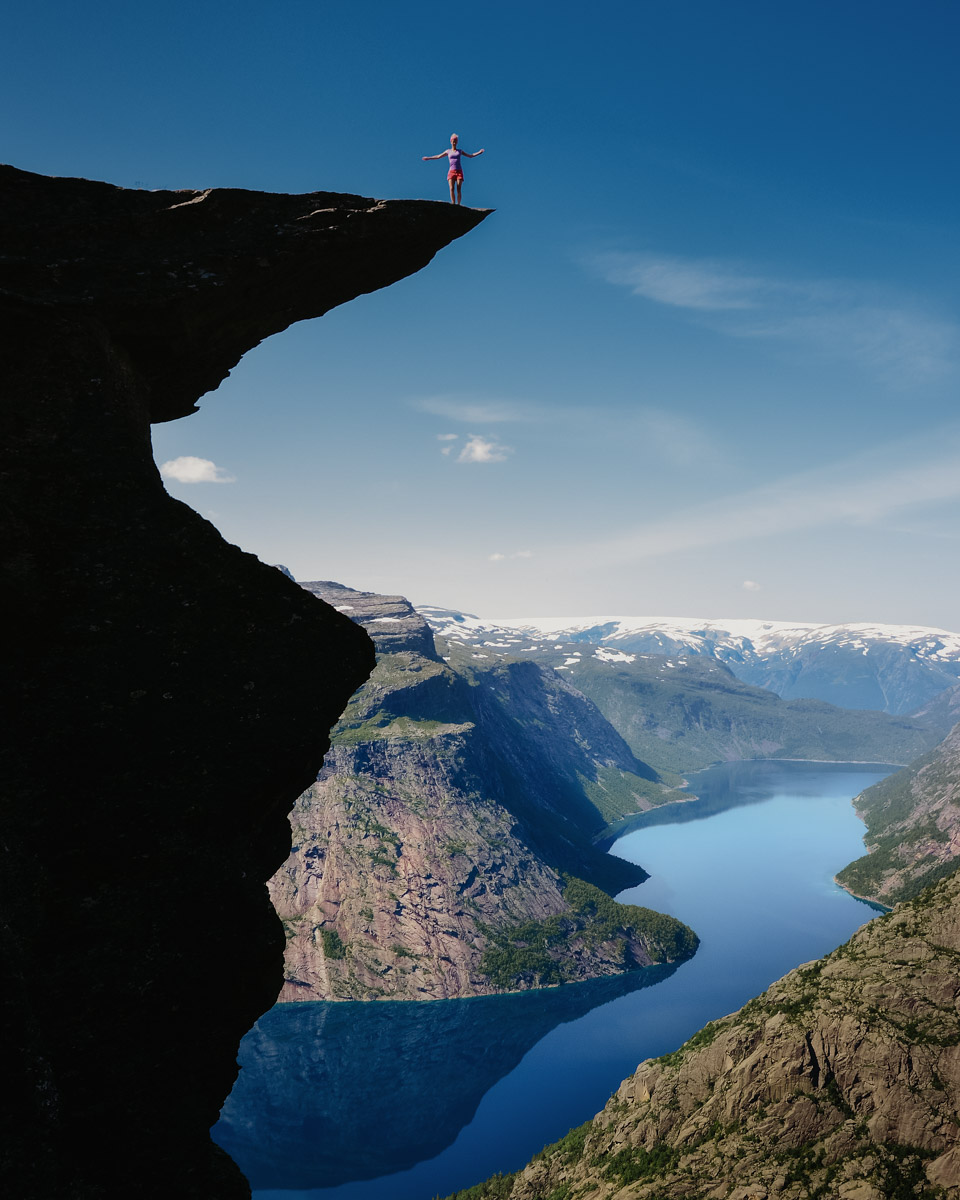
Trolltunga - it means ‘The Troll’s Tongue‘, this massive horizontal cliff is situated about 1100 meters above sea level. Beneath this rock is nothing. It is hovering 700 meters above lake Ringedalsvatnet. Trolltunga is one of the most spectacular scenic cliffs in Norway.
As far as hikes go, this is one of the most epics I’ve ever done. Important point is that I was there in 2013 and 2014, today I would avoid this overcrowded destination and explore many other parts of Norwegian nature. Before 2009 Trolltunga was virtually unknown. In 2017 more than 100.000 visitors made this popular trek.
It is difficult, it is long, but it is spectacular.
Standing on the edge of the Troll’s Tongue, I can feel the breeze around me in every direction. Not surprisingly, it’s scary to be out on this small piece of a cliff with a 700 meters drop beneath me.

Your head is full of thoughts. I realized how small the person is in comparison with nature and the high mountains. Sometimes just a little inattention and an accident might happen. However, all adventure activities are based on your own risk but it is doing unique. It was by far the greatest view.
The hike goes through high mountains and is about 20km long, takes 9-10 hours in total (to Trolltunga and return) and the ascent is about 900 meters. Consider carefully whether you have quality equipment and you are in good enough shape before the hike. Plan carefully and start early morning. The hike starts at the beginning of the funicular (not in operation) in Skjeggedal. Starts on the right side of the funicular. The path is marked with painted red T’s in the terrain.
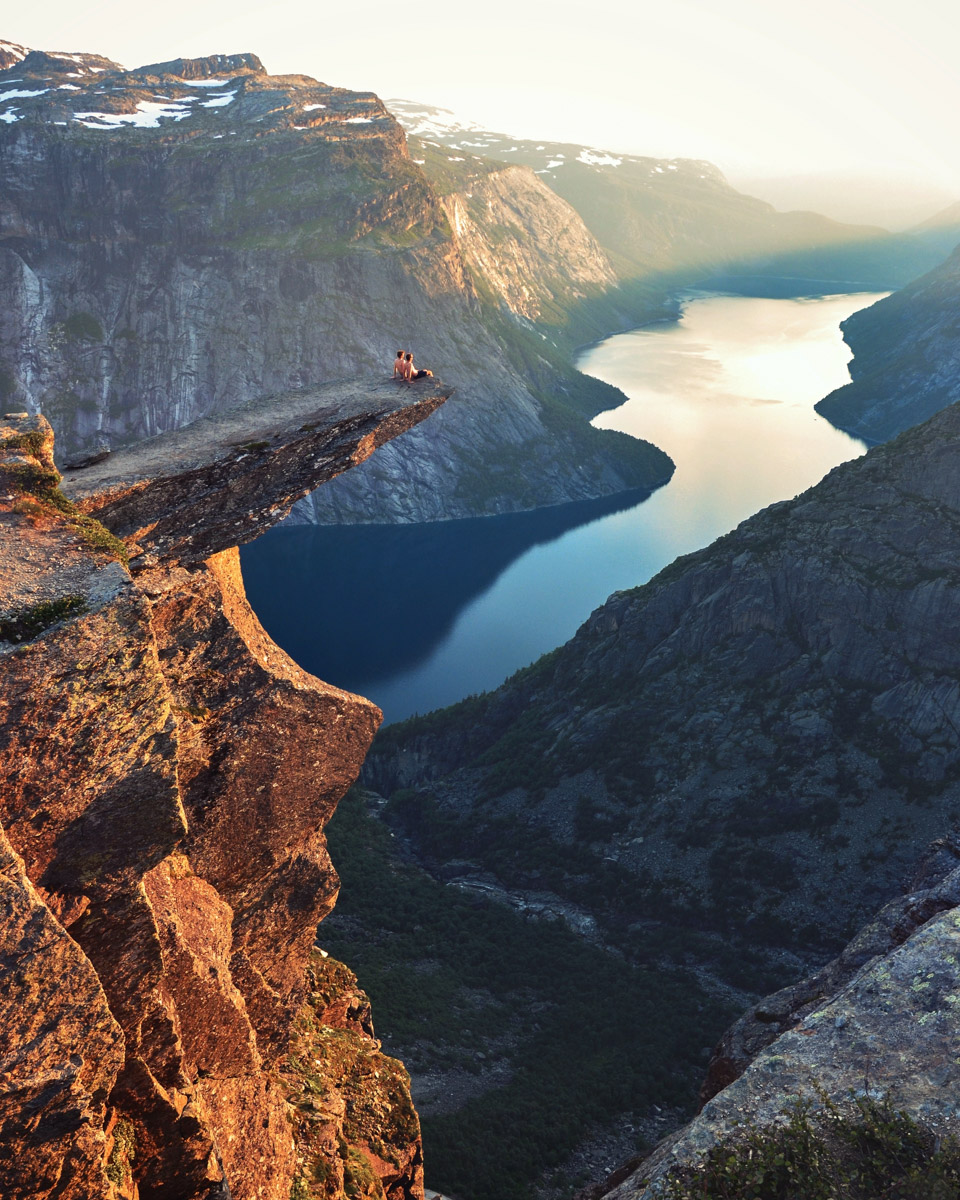
As photos from this place have spread over social media Trolltunga has become increasingly popular over the last couple of years. It is normal there is a long line of hikers weaving around the rocky terrain each morning, everyone wants to capture their version of the photo. Many tourists also have started underestimating the difficulty of the hike. The hike is actually one of the more demanding one-day hikes and I met a lot of people during the trek who were not prepared for this difficulty.

Be careful, travel mindfully, respect nature and follow the tips you have found on the internet and the hike will give you memories for a lifetime.

UNDER THE GLOW OF MILKY WAY - West Coast of the US
There wasn't a breath of wind and the sky above seemed like an endless ocean of stars. After a very cloudy and rainy day, I was rewarded with a breathtaking spectacle in a clear sky. Eventually, it was one of my most favorite nights under the glow of the Milky Way. Believe in your dreams.
I spent one month traveling through the west coast and visited the most beautiful National Parks in the USA. During my first visit to the US, there were truly phenomenal conditions for astrophotography. Let's take a look at some night photos from this trip.
The Trona Pinnacles, California
The photo below is from an area in the Mojave desert just a few hours northeast of Los Angeles. The Trona Pinnacles, an unusual geological landscape feature.
There wasn't a breath of wind and the sky above seemed like an endless ocean of stars. After a very cloudy and rainy day, I was rewarded with a breathtaking spectacle in a clear sky. Eventually, it was one of my most favorite nights under the glow of the Milky Way. Believe in your dreams.

This view is from the dirt road leading to the pinnacles. The spires rise out of the isolated desert near the town of Trona in San Bernardino These formations reach as high as 140 feet and create a dramatic impression in the isolated desert landscape.
The Trona Pinnacles makes a cool location for every landscape photographer and ranks as one of the most interesting rock formations in the US.
Delicate Arch, Arches National Park, Utah
Making this picture was really a challenge. This photo ended up becoming my the most favorite Milky Way shots ever. The photo is from the second night of my adventure trip at Arches National Park in Utah. The evening was very cloudy and I wanted to give it up. Eventually, I was rewarded with a breathtaking spectacle in a clear sky. The sky part is a stacked of 8 shots. The foreground consists of two photos. The silhouette and the shot of Delicate Arch. I used the headlamp to illuminate the Arch.

Zion National Park
In the summer days, Zion National Park is totally overcrowded with tourists. Many Zion visitors stay for sunset and then drive home or on to their next destination.
For everyone who stays later, the dark night in Zion is filled with thousands of stars, above the majestic silhouette of red mountains. It is an entirely different and memorable experience. The Milky Way above The Watchman Zion is a great place to start shot the night sky.


Another very interesting place for stargazing is Oregon. You have plenty of options. Oregon is full of unspoiled, pristine nature so you can see thousands upon thousands of stars with your naked eye. So just check the light pollution map and get to work. A super destination is Crater Lake.


Venture outside main cities and lets surrounded yourself by endless stars.

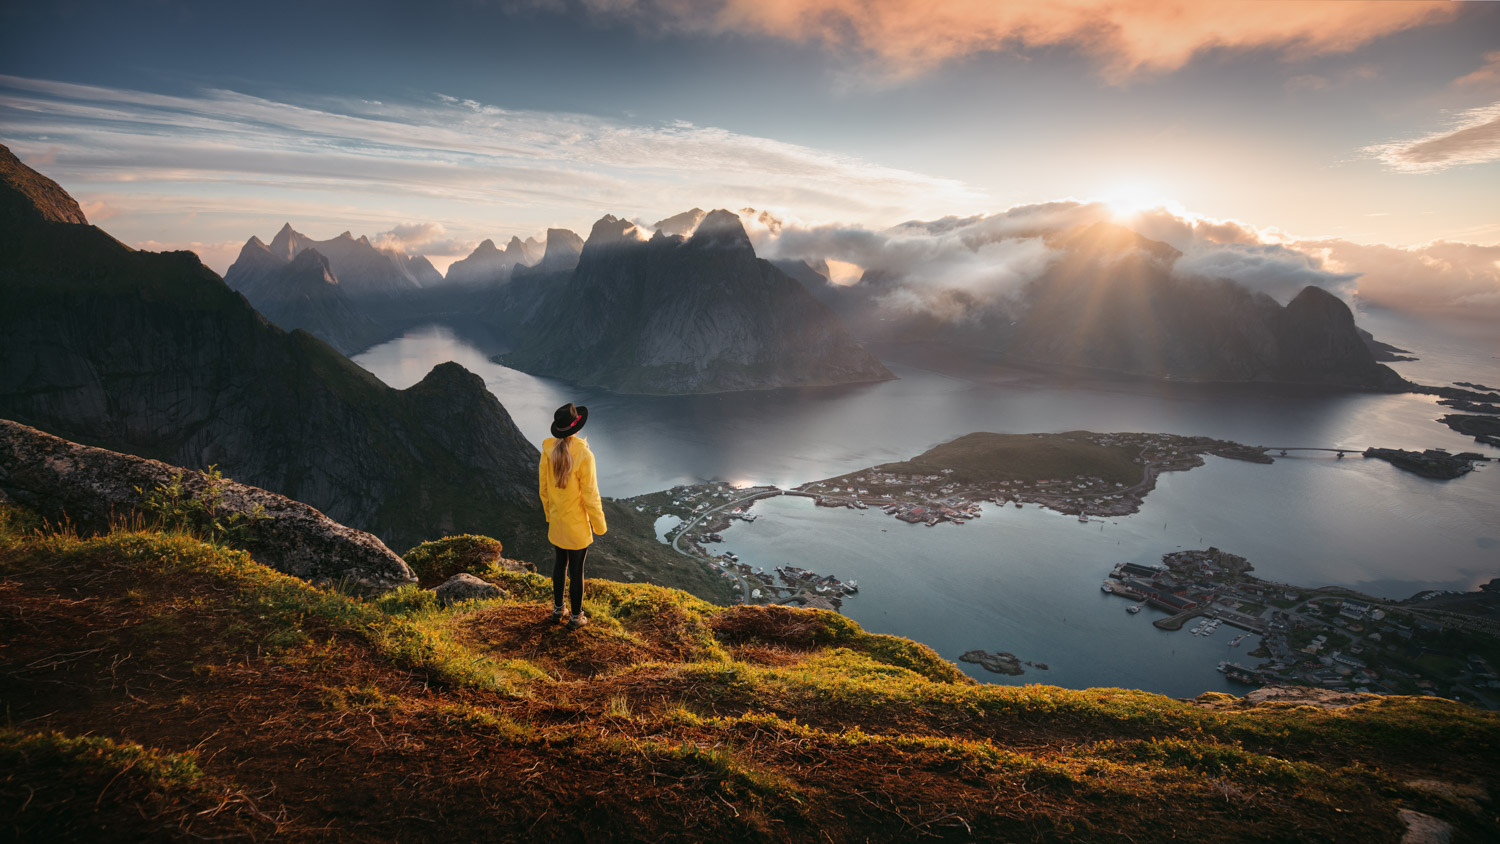
LOFOTEN ISLANDS - THE MOST SCENIC PLACE ON EARTH
Getting out and seeing what the world has to offer is at the top of my list. From beautiful fjords to massive waterfalls from the glaciers high above you. Norway is full of gorgeous, untouched nature waiting to be explored. I have been there three times and in my opinion, this place is one of the most incredible places I have ever seen.
Getting out and seeing what the world has to offer is at the top of my list. From beautiful fjords to massive waterfalls from the glaciers high above you. Norway is full of gorgeous, untouched nature waiting to be explored. I have been there three times and in my opinion, this place is one of the most incredible places I have ever seen.


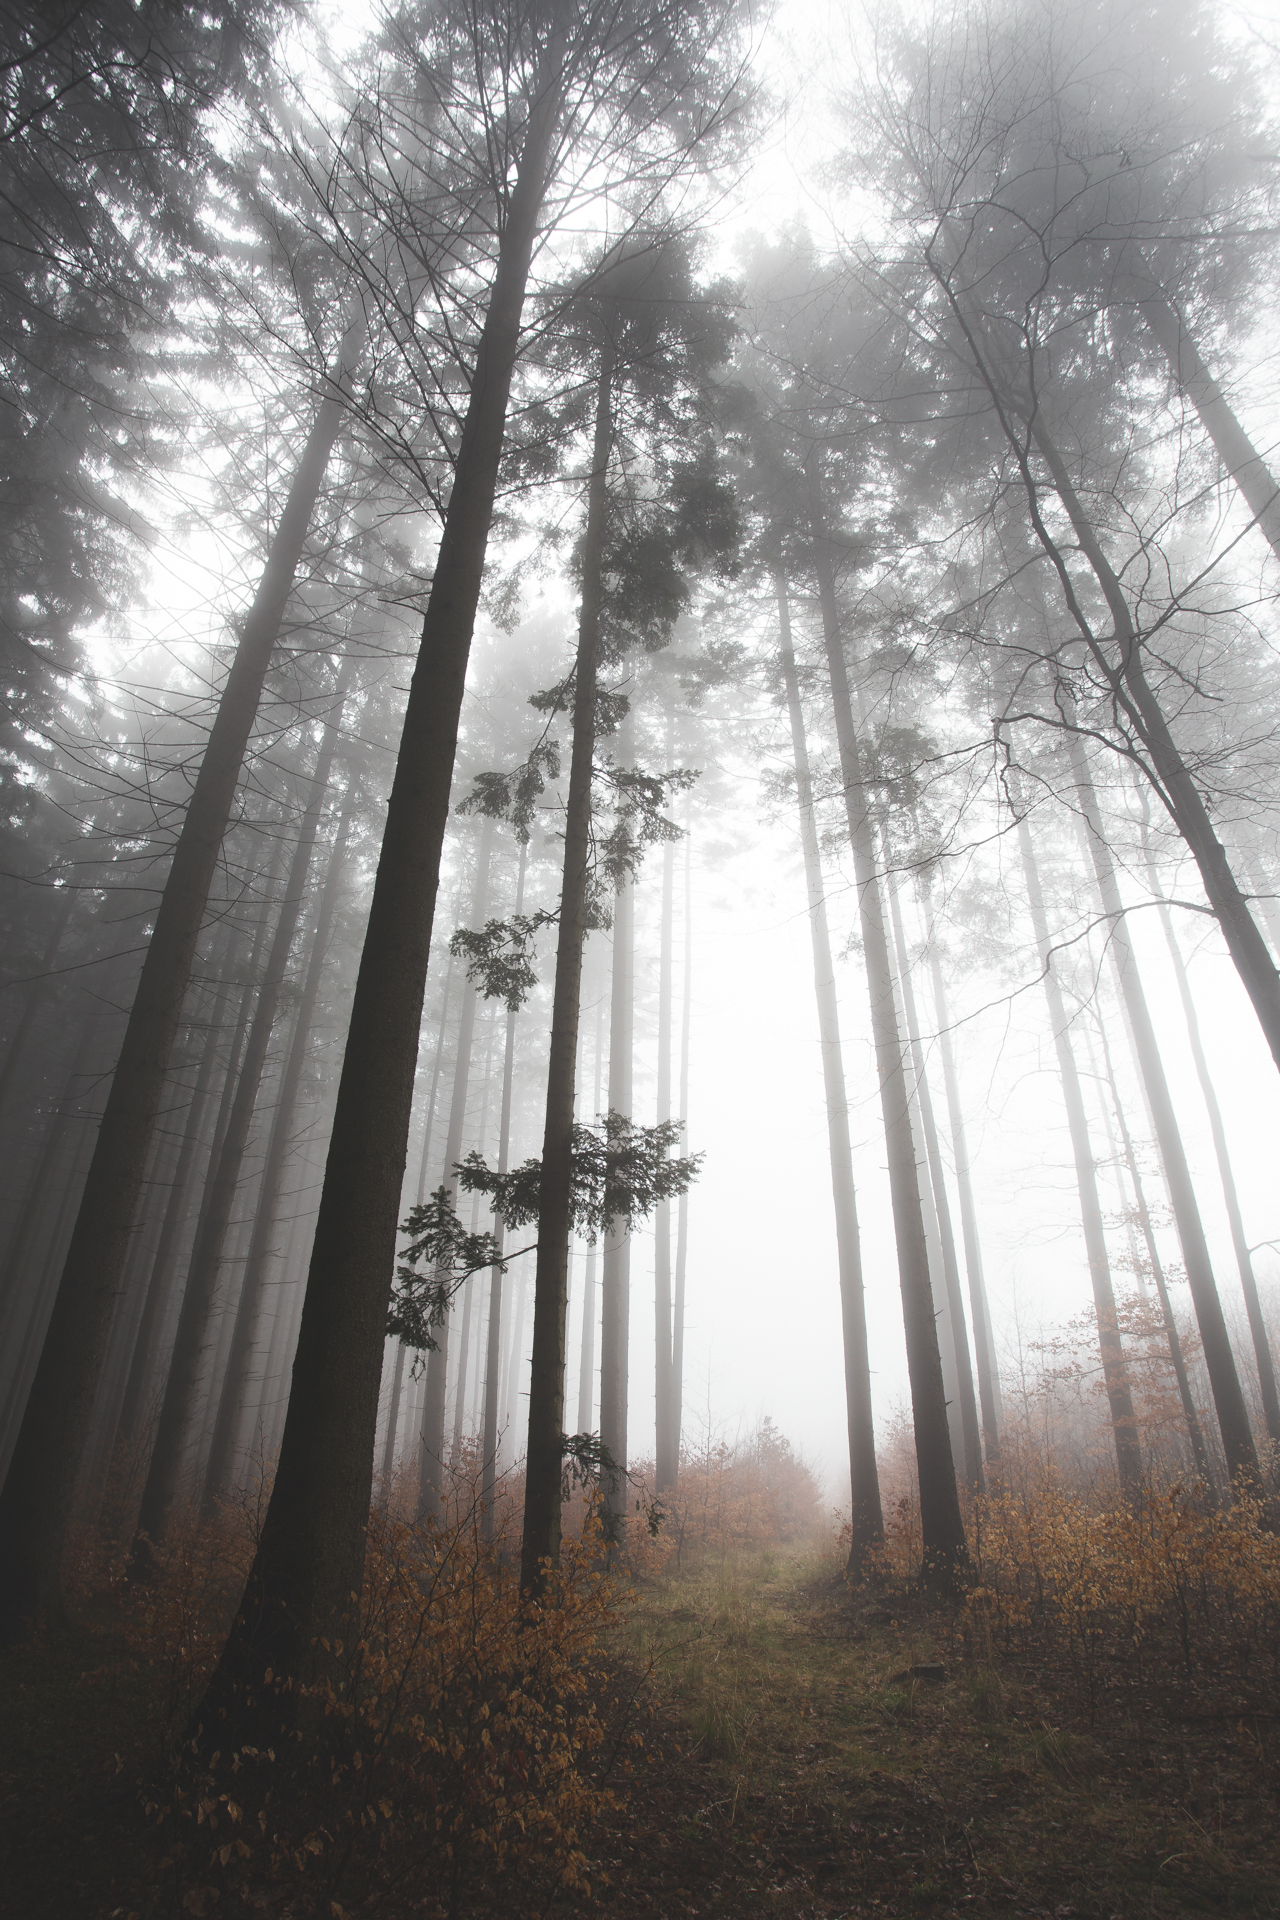
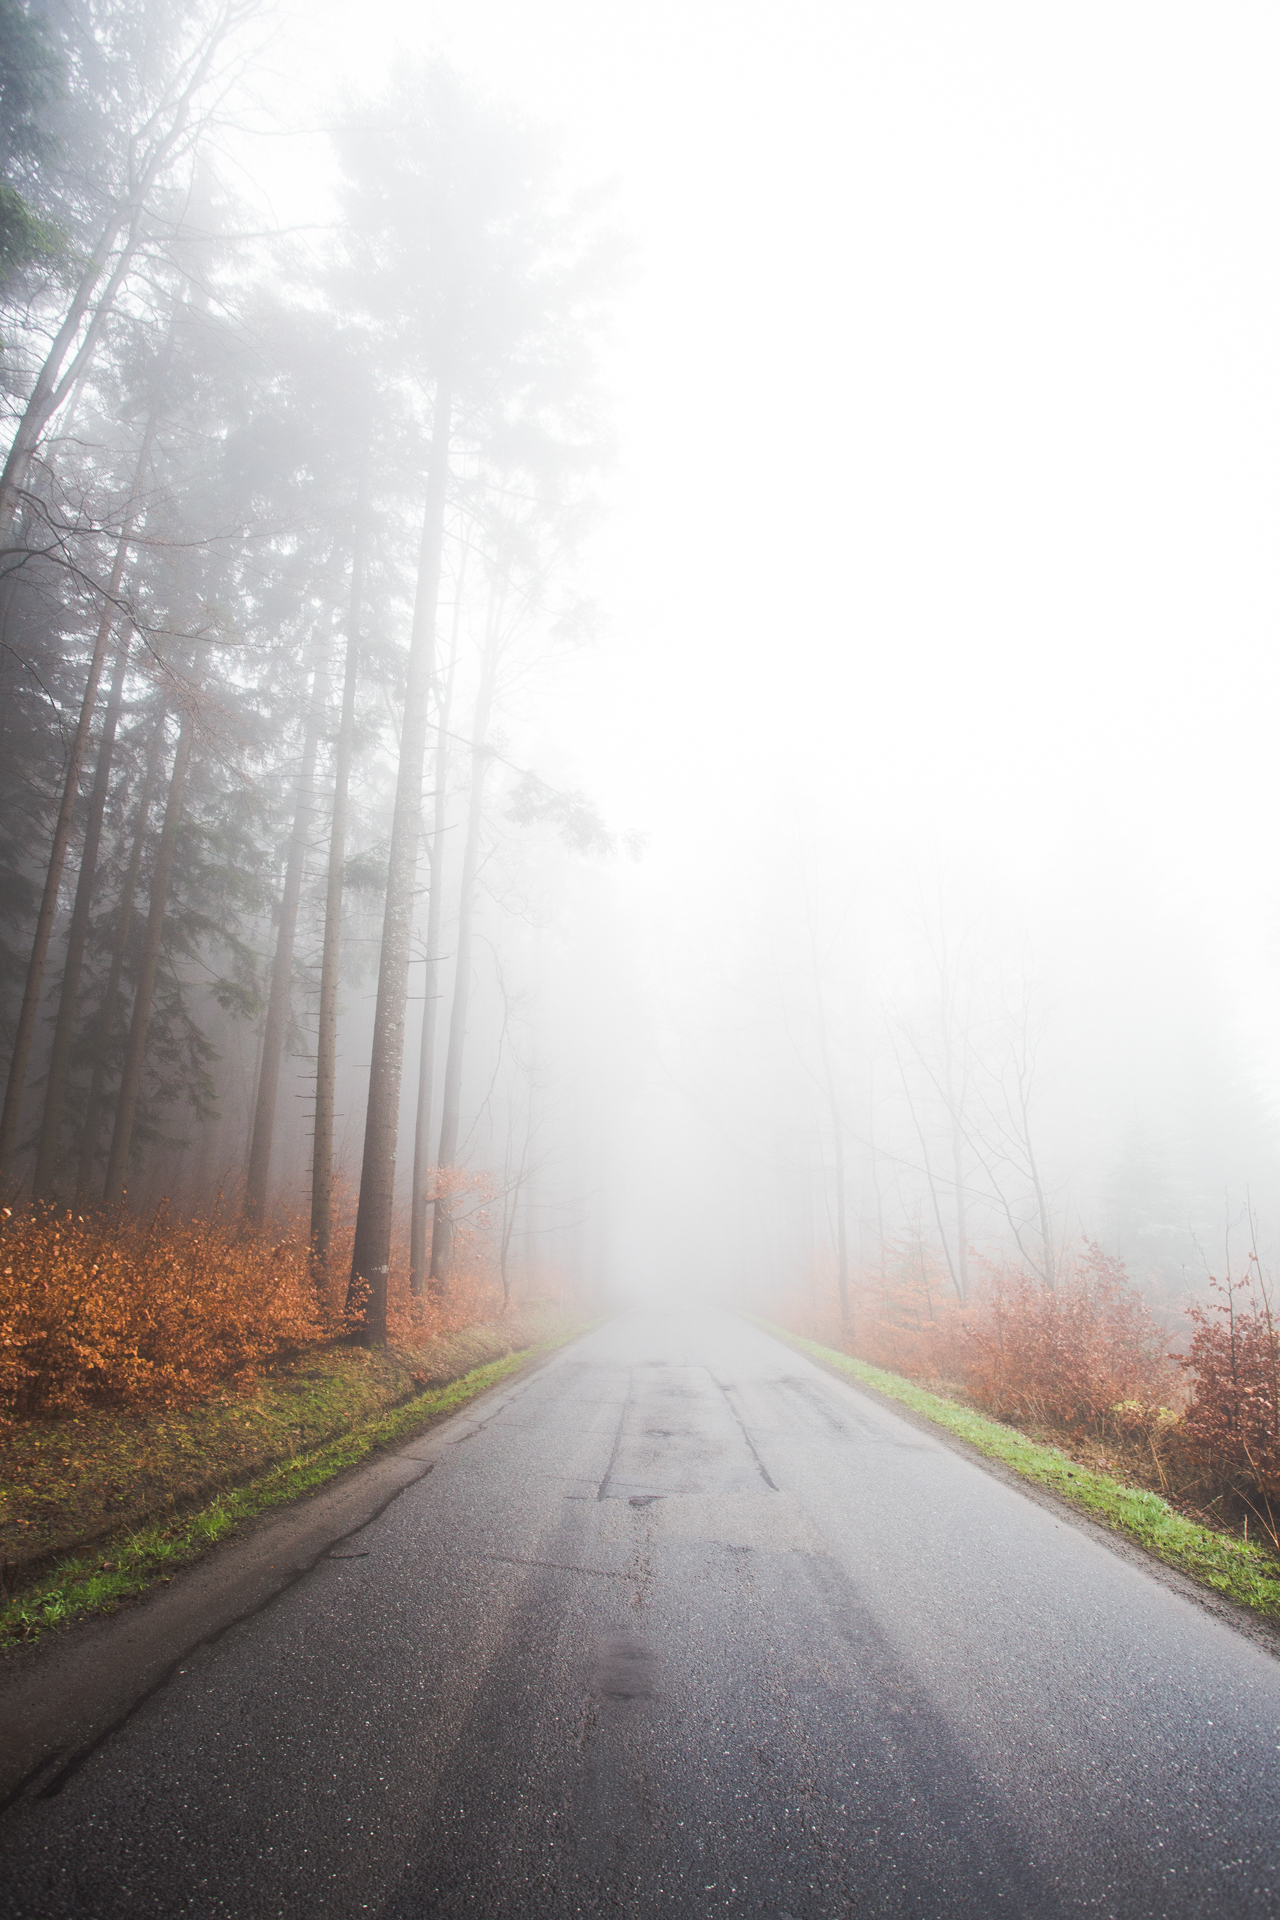
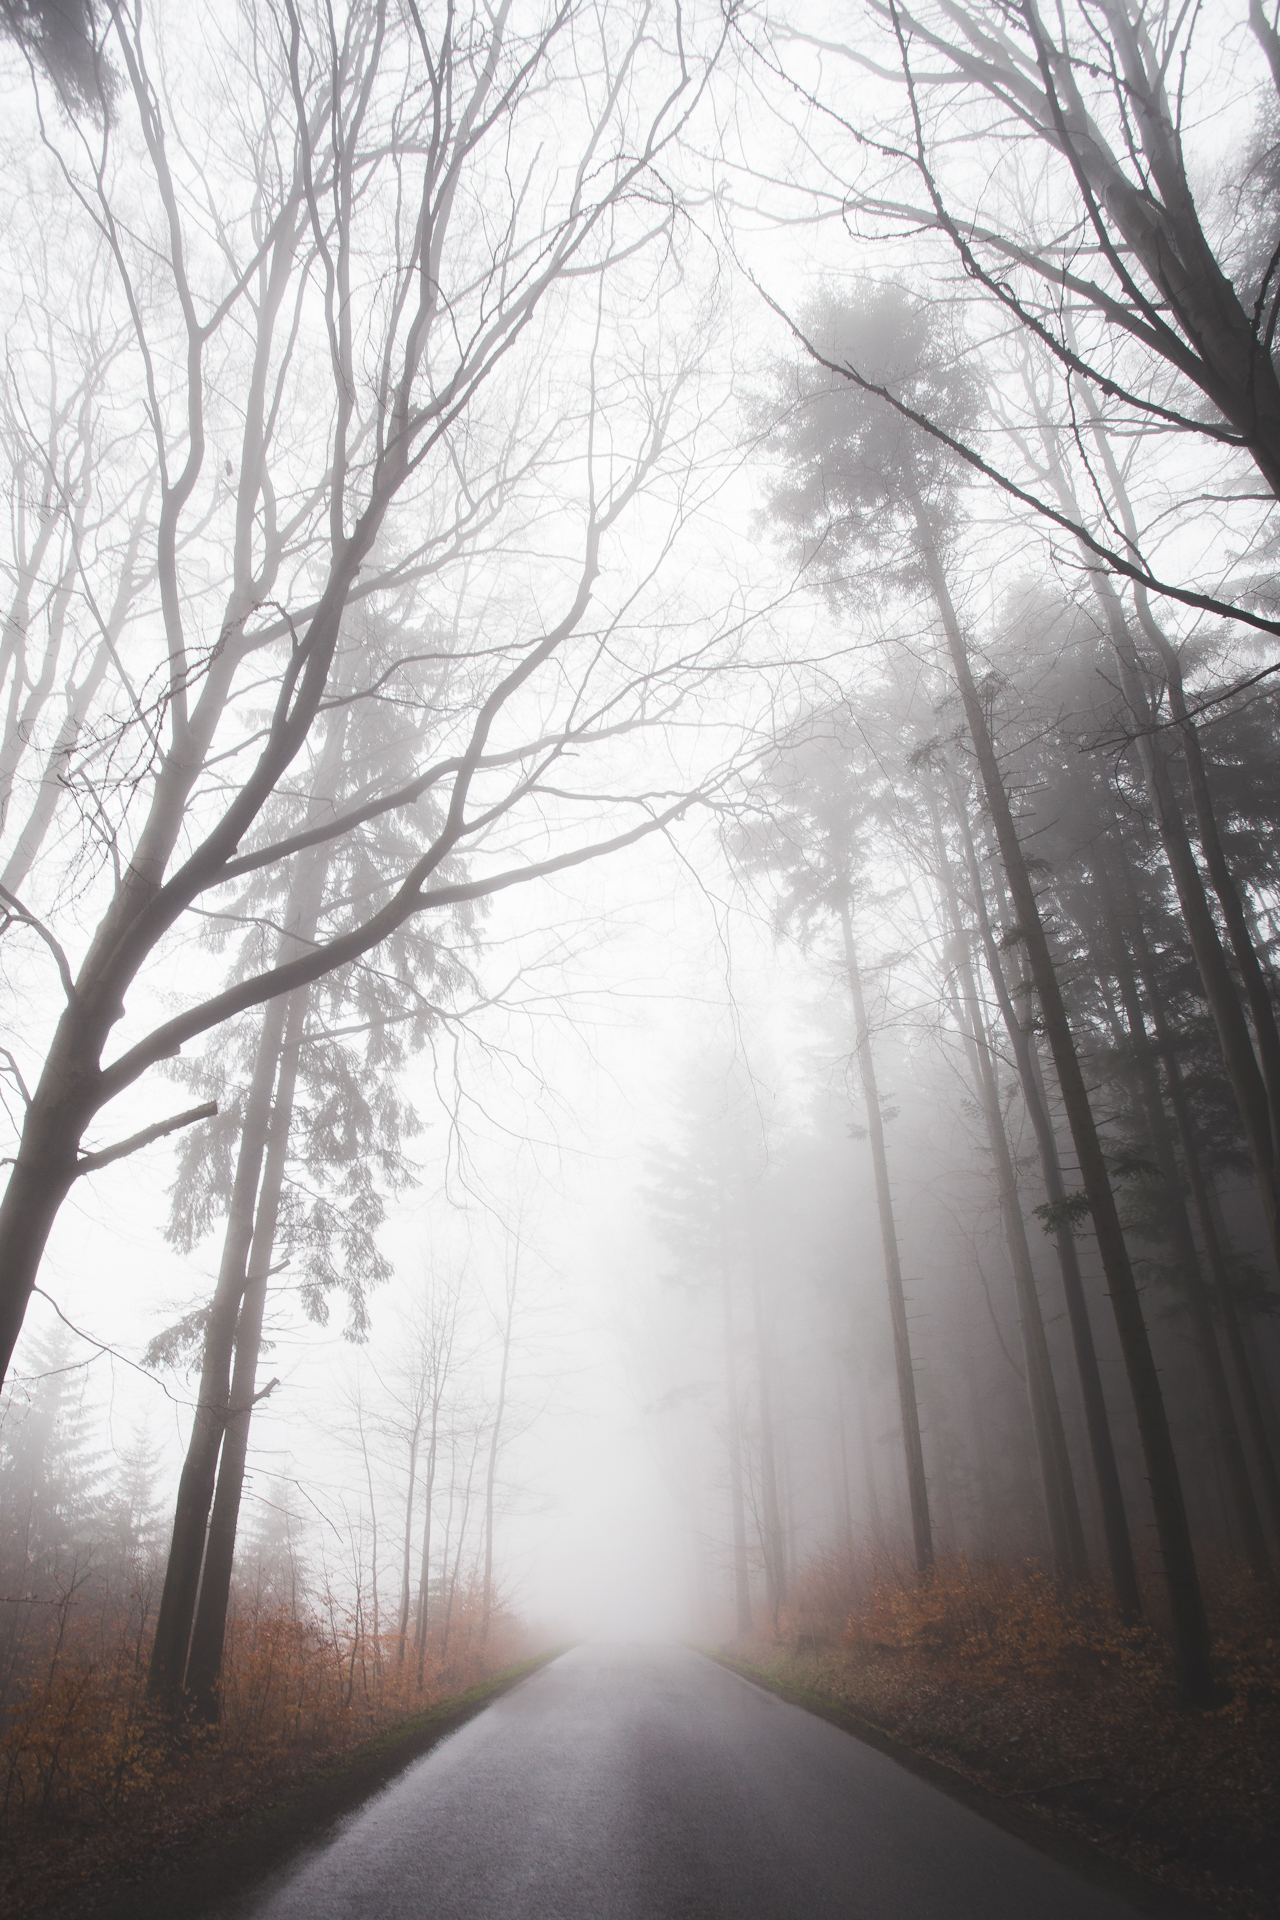
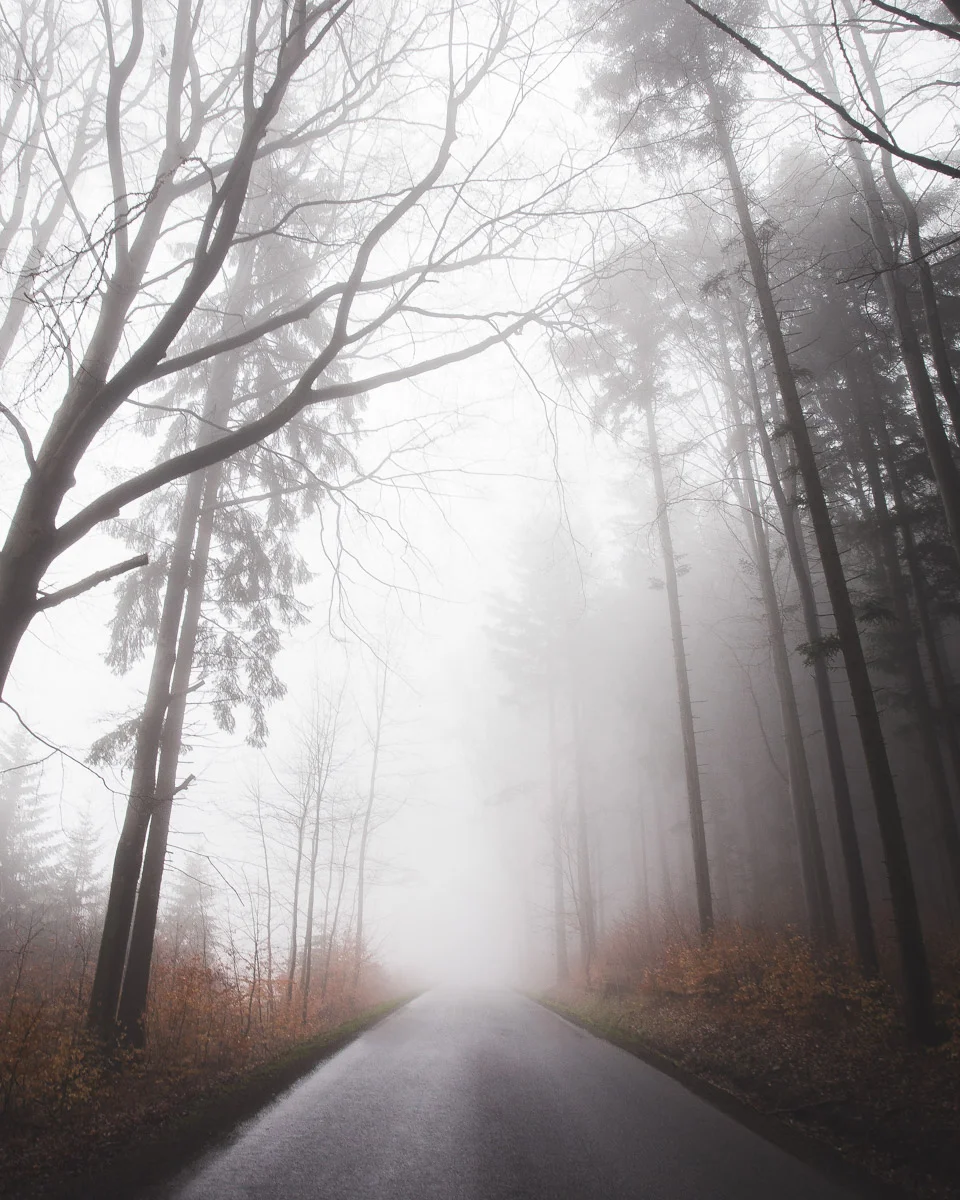
FOGGY HIGHLANDS
A magical time, when the last leaf falls down the tree, mornings are quiet, the land is wet and cold, thick fog blankets meadowland... It is the time of autumn mist. All these foggy pictures come from my native region in the Czech Republic.
A magical time, when the last leaf falls down the tree, mornings are quiet, the land is wet and cold, thick fog blankets meadowland... It is the time of autumn mist. All these foggy pictures come from my native region in the Czech Republic. Around the Křemešník hill, there are a lot of mixed forests and beautiful meadows with grazing horses.

Usually, when you look out the window and see a foggy, hazy day, you tell yourself it is not worth taking out the camera. It will definitely be worth the effort. It is always a stunning experience seeing the nature waking and wandering in the woods with the morning fog.


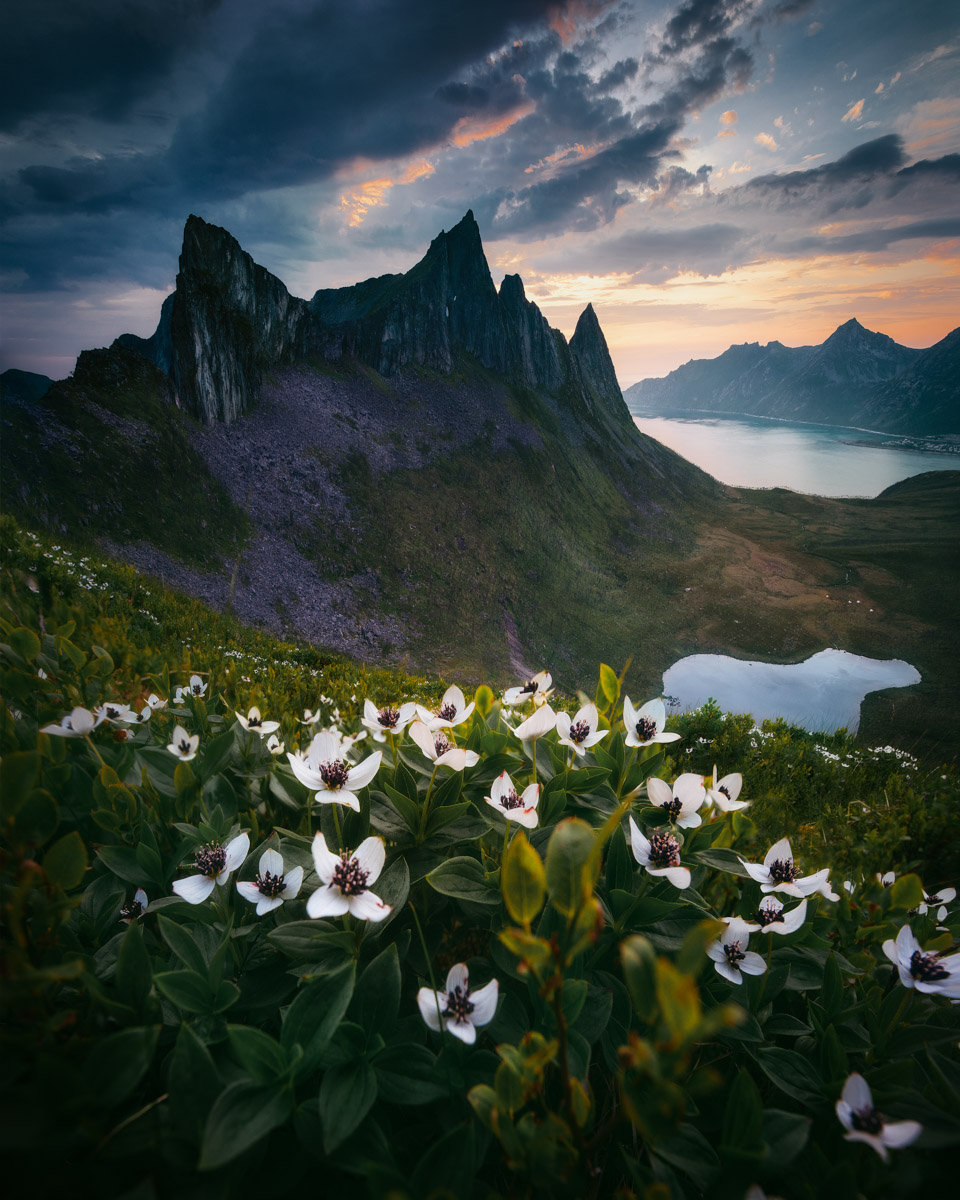
SENJA - WHERE THE SUN NEVER SETS
The country where the sun „never sets“ will always be in my mind and I will never forget these breathtaking memories. I will always come back with enthusiasm and expectation of new experiences.
The country where the sun „never sets“ will always be in my mind and I will never forget these breathtaking memories. I will always come back with enthusiasm and expectation of new experiences.

It's a fabulously quiet island in the north of Norway. Its dramatic scenery offers views you have never dreamed of. The infinitely rugged coastline and dozens of peaks you can climb. Before you get used to life here, you feel like you're on another planet for a while.
The wild and untouched Senja lets you spend a trip in harmony with nature. You will realize that perhaps our planet is not so bad. There are no crowds of tourists and you will meet only a few other hikers during your journey. You will probably enjoy the views from the tops totally alone. You will be enchanted by the fjords that surround the island. It is interesting that it lies very close to the mainland and you can get there easily, just cross the bridge near the town of Finnsnes.
Continue on the main road number 86. Then just choose and turn to the side road that takes you to the coast. You should not miss Ånderdalen National Park, which offers beautiful long treks. Senja is the second largest island in Norway and if you visit it, be sure you will reach the north. Drive the entire coast by car and pick the peaks you want to climb.
The most famous and truly the most interesting hike on the island is to the summit of Segla. Its steep sharp peak rises from the sea to the height of 639 meters. If you have dizziness, do not even look over the edge. The hike to the top and down takes from 3 to 4 hours in total (5 km round trip).


Because this mountain is not known as much as other Norwegian cliffs (Preikestolen, Trolltunga), you will not meet too many tourists here.
Fjordgård
The trail begins in the small but beautiful village of Fjordgård, which is full of multicolored houses. Specifically, there are two hiking trails. The first begins from the edge of the village directly to the summit of Segla, the second leads from the middle part of the village.

The most beautiful and famous view to the Segla mountains is from the side mountain Hesten, which is even easier to climb than the Segla itself. The summit itself ends with an almost infinity cliff and the views to all sides are breathtaking.


Do not be afraid of discovering less known views and paths. There are many of them. Exploring is a very important part in the process of growing, not only as an artist but as a person as well. It’s where you discover yourself, who you are and what you want to be.
Enjoy the endless beauty of northern Norway, a country where the sun never sets.


HOW TO EDIT WITH LIGHTROOM PRESETS
I hope that this tutorial can help you understand my presets and take your photo editing up to the next level with just a few clicks.
Step-by-step guide by Tomas Havel | @tomashavel
I hope that this tutorial can help you understand my presets and take your photo editing up to the next level with just a few clicks.
Please note that because every image is different, every preset is meant as a starting point. Most presets work differently on every image depending on the exposure, lighting, colors in the image, etc. Therefore I do not include the correction of the exposure and white balance to make presets more versatile.
All preset collections include premium structured preset layers (gradients/light effects) and give you the freedom to create. Based on those premium filters a desktop version of Lightroom is recommended for the best results.
To get the most out of my presets, do the following:
1) Apply one of the main preset looks (presets: 1.1 - 1.20) .
Each preset gives you a different color scheme and atmosphere, adds vibrancy to your landscape images, improves the dynamic range and light, or brings out a drama in them. Every collection by Tomas Havel is designed to match a variety of different landscapes in specific conditions.
Before applying them, please adjust exposure properly to get the most out of the presets. It’s best to get the correct exposure in camera when shooting. However, you can adjust it in Lightroom if needed. The second step is to make sure your white balance is spot on, then my presets give you the look you’ve been trying to achieve.
2) Add Vignette or special Light Effects & Gradients (presets: 2.1 - 5.1).
Vignetting - This collection includes four types of realistic vignette. Which vignette you choose is entirely up to you. Vignetting adds drama, brings the mood to your photos, and above all, sets off the main subject and makes your pictures pop.
Radial filters - "Spotlights" - Creating a dreamy ambiance and light. This effect is set in the middle of the image and need to adjust the position manually as needed. The ideal position of the Spotlight is the side of the photo from where the sunlight shines. You can reduce or increase radial filters depends on the real light.
Graduated filters - "Dramatic Gradients" These dramatic filters are designed for both vertical and horizontal photos. You can easily darken the sky or the foreground to increase the dynamic range or bring out a drama into your landscape images.
3) Sharpening
The secret to doing sharpening without introducing noise is to hold alt / cmd key and drag the masking slider to see where the sharpening is being applied to. Set the masking slider around 50-75 for great sharpening of the edges only.
Now the image is crisp without any noise on the sky or on spots without any texture.
Here you can see the application of presets to my certain photo.
Presets used: "1.3 Golden Hours" with "Vignette++" together with "Warm Spotlight" adjusted to the position of the sun.
This combination of presets creates a unique dreamy look, add s vibrancy of sunset colors, improves the dynamic range, and enhances the main object.
The photo was taken in the Czech Republic just a few minutes before sunset.