
How to edit with Lightroom Presets
Step-by-step guide by Tomas Havel | @tomashavel
I hope that this tutorial can help you understand my presets and take your photo editing up to the next level with just a few clicks.
Please note that because every image is different, every preset is meant as a starting point. Most presets work differently on every image depending on the exposure, lighting, colors in the image, etc. Therefore I do not include the correction of the exposure and white balance to make presets more versatile.
All preset collections include premium structured preset layers (gradients/light effects) and give you the freedom to create. Based on those premium filters a desktop version of Lightroom is recommended for the best results.
To get the most out of my presets, do the following:
1) Apply one of the main preset looks (presets: 1.1 - 1.20) .
Each preset gives you a different color scheme and atmosphere, adds vibrancy to your landscape images, improves the dynamic range and light, or brings out a drama in them. Every collection by Tomas Havel is designed to match a variety of different landscapes in specific conditions.
Before applying them, please adjust exposure properly to get the most out of the presets. It’s best to get the correct exposure in camera when shooting. However, you can adjust it in Lightroom if needed. The second step is to make sure your white balance is spot on, then my presets give you the look you’ve been trying to achieve.
2) Add Vignette or special Light Effects & Gradients (presets: 2.1 - 5.1).
Vignetting - This collection includes four types of realistic vignette. Which vignette you choose is entirely up to you. Vignetting adds drama, brings the mood to your photos, and above all, sets off the main subject and makes your pictures pop.
Radial filters - "Spotlights" - Creating a dreamy ambiance and light. This effect is set in the middle of the image and need to adjust the position manually as needed. The ideal position of the Spotlight is the side of the photo from where the sunlight shines. You can reduce or increase radial filters depends on the real light.
Graduated filters - "Dramatic Gradients" These dramatic filters are designed for both vertical and horizontal photos. You can easily darken the sky or the foreground to increase the dynamic range or bring out a drama into your landscape images.
3) Sharpening
The secret to doing sharpening without introducing noise is to hold alt / cmd key and drag the masking slider to see where the sharpening is being applied to. Set the masking slider around 50-75 for great sharpening of the edges only.
Now the image is crisp without any noise on the sky or on spots without any texture.
Here you can see the application of presets to my certain photo.
Presets used: "1.3 Golden Hours" with "Vignette++" together with "Warm Spotlight" adjusted to the position of the sun.

This combination of presets creates a unique dreamy look, add s vibrancy of sunset colors, improves the dynamic range, and enhances the main object.
The photo was taken in the Czech Republic just a few minutes before sunset.

6 Best Apps for Night Photography
I recommend downloading these 6 apps to make shooting stars much easier. They will help you find the perfect weather, the position of the Milky Way or the moon.
Are you interested in shooting stars and night photography? These astrophotography apps make shooting stars much easier. They are recommended for finding an ideal location, perfect weather conditions, identifying stars, the position of the Milky Way or the moon.
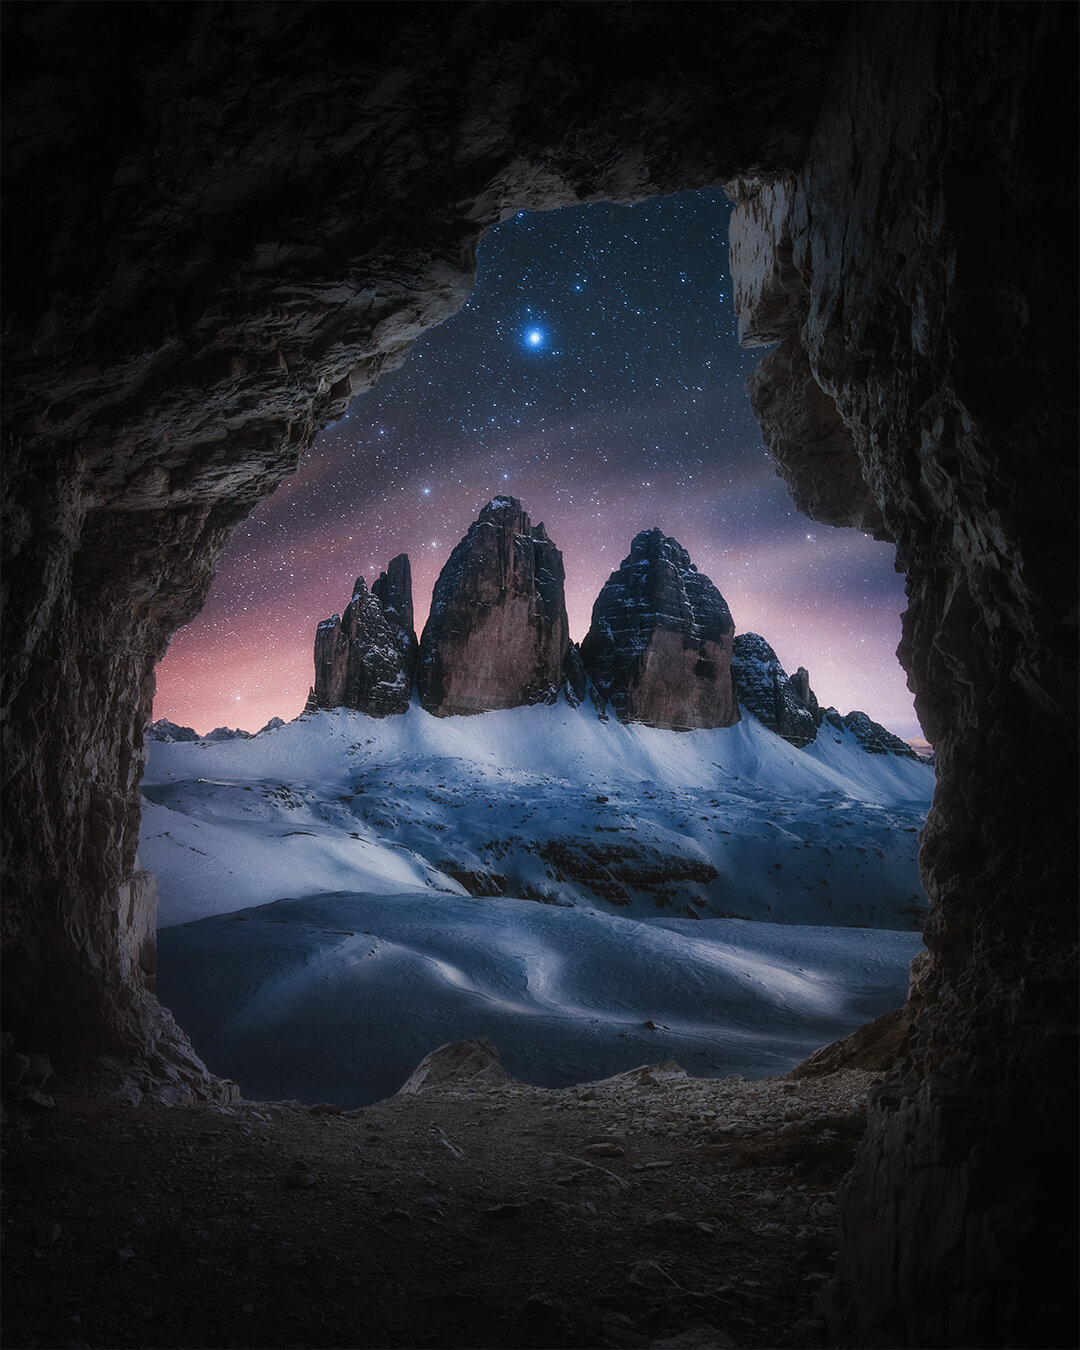

This article is a small part of our extensive guide: Beginners Tips for Night Sky and Star Photography.
Dark Sky Finder
Light pollution is a major problem in photographing stars. This app will help you find the darkest spot for observation. Users add their favorite places along with notes.
Weather Underground
This is one of the most accurate predictions. When it says it will rain in 20 minutes, it rains in 20 minutes. What makes the app special for us? You can set your own specific notifications. If you are waiting for the fog after the rain, simply set the alert.
Deluxe Moon
This is my favorite monthly app. It offers a visual idea of how much light the moon reflects. Ideal conditions occur when the moon is new or far below the horizon. I can see exactly when this will happen.
TPE - The Photographer's Ephemeris
It is a web-based and mobile application that simply helps to outline where it will shine in a given location. You can see the light falling into place, both day and night, using the sun and moon position calculator.
Go Sky Watch
This app is great to identify stars in the sky. You can locate stars, planets or entire constellations simply by pointing your mobile phone toward the sky and rotating it.
PhotoPills
You should install ff you are really interested in astrophotography. Finding the Milky Way has never been easier. The app offers countless features that are very useful. For example, if you have a 14mm, f / 2.8 Samyang manual lens, you can use the calculator to calculate the shutter speed at aperture and ISO.
How to Import Lightroom Presets to Desktop & Mobile
Step-by-step guide by Tomas Havel | @tomashavel
HOW TO IMPORT DESKTOP PRESETS!
There are two methods for installing presets to Lightroom CC:
1. Import the presets directly into Lightroom,
2. Drag your Presets into the specific presets folder.
1. Import the presets directly into Lightroom
If you have the latest version of Adobe Lightroom the process of installing presets cannot be any easier. You can install the presets in XMP format them directly into Lightroom in one single step.
1) Open Lightroom and go to the Develop Module and locate the Presets Panel.
2) Click the + on your Presets tab and hit “Import Presets”.
3) Navigate to the location on your computer where you saved the zipped or unzipped file with the presets, select it and click the Import button. (It’s highly recommended to select the preset folders, so that Lightroom will keep the organization structure.)
4) You are done. Lightroom locates the presets in the new XMP format and you will find it when you open the Presets tab. If your presets are not automatically there, you can restart Lightroom.
Note: This method only works if you are installing presets in the new XMP format.
2. Drag your Presets into the specific presets folder
1) Open Lightroom Classic on your desktop and click on the Lightroom tab in the top left corner of the screen .
2) Click on Preferences then Presets
4) Click On 'Show Lightroom Presets Folder'
5) This shows all the Lightroom preferences, but we want to just see the presets - Go to the "Develop Preset Folder". You should see all the presets you were previously using in there.
7) Unzip the file, then just copy the entire folder into Develop Preset Folder.
8) Restart your Lightroom, you should now see the presets added.
HOW TO IMPORT MOBILE PRESETS!
There are three methods for installing presets on Lightroom Mobile:
1. Install presets with DNG files (included in every pack),
2. Import XMP presets from your local storage (Android only),
3. Sync Lightroom Classic with Lightroom Ecosystem.
To start off, download the free Adobe Lightroom CC App from the Apple App Store (iOS) or Google Play Store (Android). Once downloaded, if you haven't already, you will then need to create an Adobe account. Quick and free to do!
1. Install presets with DNG files (included in every pack)
1) Unzip the folder and transfer the DNG files to your phone via Dropbox, WeTransfer or any other method you prefer. You can use apps like iZip to unzip the file directly on your phone. Note that DNG file might look like a completely unedited photo. Don’t worry, it does have edits to it and it will act as your preset once it’s installed in your Lightroom app!
2) Import all DNG files to your Lightroom mobile app: Open the Lightroom app and create a new album. Tap on the 3 dots in the upper right corner and then tap on Add Photos. Select all DNG presets from your phone and import them into the newly created album in Lightroom mobile.
4) Create and save your presets: Go into the presets folder and click on the first preset. Now click on the the three on the top right corner then select the 'Create Preset' button. Under 'Preset Name' type the name of the preset.
5) Follow the same process for the other DNG files and save them all.
2. Import XMP presets from your local storage (Android only)
To directly import presets to the Lightroom app, do the following:
1) Open a photo in Loupe view. In the Edit screen, tap the Presets icon in the bottom panel.
2) Tap the three-dots icon in the upper-right corner and select Import Presets.
3) Tap the presets you want to import either from Google Drive or any folder on your mobile. You can select individual xmp files but also select zip files that contain multiple xmp files.
4) The imported presets then appear in the Presets pop-up menu.
The imported presets sync across Lightroom desktop and Lightroom for mobile (iOS) so that you can access them from any device.
3. Sync Lightroom Classic with Lightroom Ecosystem
Learn how to set up Lightroom Classic desktop to sync photos with Lightroom ecosystem of apps with official instructions by Adobe here: /lightroom-mobile-desktop-features.html
Note: You need a Creative Cloud membership or trial to sync photos across all your devices.
Lightroom for mobile | Premium features
Please note, premium features only available to subscribers. All selective adjustment tools are only available on a mobile device when you purchase Adobe Lightroom CC App subscription. /lightroom-cc/using/premium-features.html
How to edit with Lightroom Presets!

Beginners Tips for Night Sky and Star Photography.
I would like to bring the night shots closer to enthusiasts without professional ambitions and show that this is certainly not as unattainable as it may seem. I have prepared the most important information for you.
Raise your head and let yourself be carried away by the shimmering glow of the night sky.
The photos of the night sky have always fascinated me from my childhood. I was just lying on the rocks, staring at the shimmering sky and counting the falling stars.
It took a long time for me to capture the heavenly beauty in photos. Shots of Milky Way are still not very common as they cannot be taken simply by pressing the shutter button. Some effort is needed.
I would like to bring the night shots closer to enthusiasts without professional ambitions and show that this is certainly not as unattainable as it may seem.
The camera opens our view into the distance and allows us to see more than is possible with the naked human eye. I will show you step by step how you can shoot stunning pictures of the starry sky by yourself.
My favorite photo of our galaxy (the shot below) was taken in the Arches National Park. There are stars brighter than you can ever imagine. To get the same results, I have prepared the most important information for you. Let's do it!


Equipment required
It won't work without a quality digital camera. Night photography requires a more skilled machine with Manual mode. Equally important is the lens with a good aperture. Personally, I like wide glass that can capture the whole starry spectacle.
What camera gear do I use for astrophotography?
My favorite setup for astrophotography: Sony FE 16-35mm f/2.8 GM or Samyang 14mm f/2,8.
Remember to charge the batteries and possibly pack many others.
Necessity is a solid tripod that does not break any wind or uneven terrain. If you ask about my beginnings, yes, a car roof or a tree stump can also be used.
If you're serious about shooting stars, get a remote control. This will prevent camera shake after pressing the shutter button.
Remember to take a flashlight, preferably a headlamp. A courageous partner is also very important to me. Choose someone who is not afraid of the dark, will be a pleasant company or even part of the picture. During colder nights, you will be happy with thin gloves, a hot thermos of tea and something good to eat when you will be waiting for the clouds to leave.
Good preparation avoids disappointment
Clear nights are very cold, but the more brilliant photos are worth it.
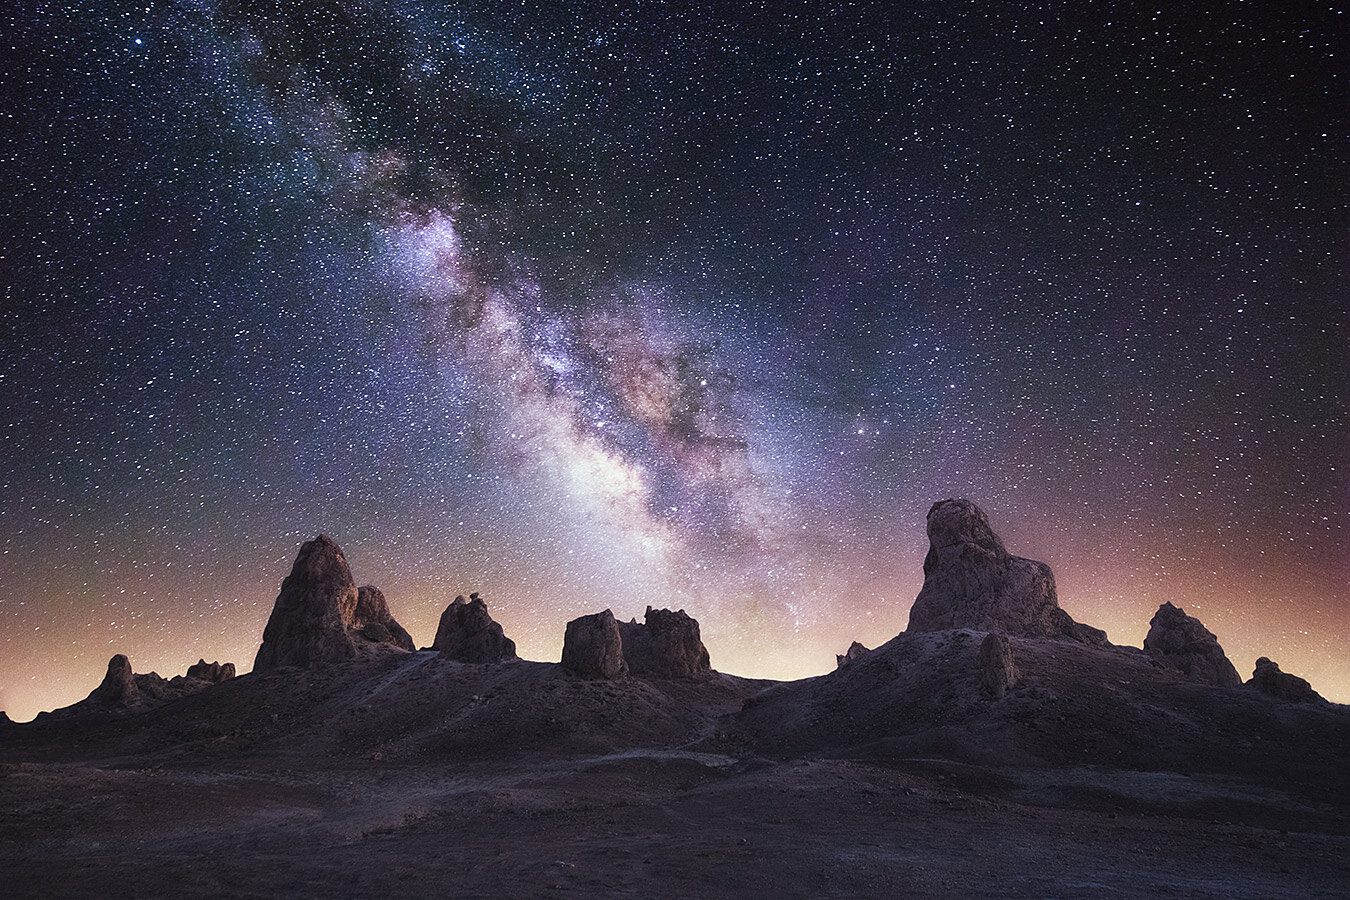
There is a simple rule: the darker area and the sky (without the moon) the clearer and more colorful the photo of the Milky Way.
If you choose the Milky Way as the main object of your shot, try to compose it in the middle of the scene.
Often a pure sky shot is boring and generic. Find a place with a beautiful silhouette for the foreground, a beautiful tree, a lake (reflection) or even an interesting building.
Just like the moon, the stars move over the night sky and thus not all-star pictures are always visible.
There are very good free apps like SkyView® (iOS / Android) that project the starry sky in real-time through the camera and specify locations of the moon, sun, planets, and satellites.
So you succeed in an impressive composition even without astronomical expertise.
The stars and the Milky Way are most visible during the summer months.
The optimal location for clear stars
The fewer light sources near the camera, the better. Optimal places to photograph the starry sky are usually elevated - on a hill or mountain, on which there are no other light sources. The area near large cities is usually unfavorable, as a city with its thousand lights, can emit light over several hundred meters.
Fortunately, there are a lot of helpers.
On the following websites, you can see the map of the light pollution from any different places to quickly find a dark location: www.lightpollutionmap.info or www.darksitefinder.com/maps/world.html
In addition, there are cool apps called Sun Surveyor or PhotoPills, with which you can determine for a specific location, where the stars, moon or sun at any time. With this or other tools, the shoot can be well planned and you be able to find an optimal time.
Find more about the helpers: 6 BEST APPS FOR NIGHT PHOTOGRAPHY
QUICK CAMERA SETTINGS:
manual mode M
aperture as low as possible (f/1.4 or f/2.8)
higher ISO 3200 - 6400
exposure 20-30 seconds
ISO
The value between 5000-6400 is necessary so that something good can be seen in the picture. If the ISO value is too high, a grainy picture appears, on which the stars can no longer be distinguished from the noise.
Good post-production also plays a role in star photography. Stay tuned! :)
If you have any unanswered questions, leave me a comment. Good luck and feel free to share your creations with me.

TOP 5 WEBSITES TO LEARN PHOTOGRAPHY FOR BEGINNERS
Explore the list of best sites to learn photography suitable for beginners and intermediate learners. A learning curve is essential to growth. Invest in yourself and improve your skills, you won't regret it.
A learning curve is essential to growth. Invest in yourself and improve your skills, you won't regret it!
Finding the right resources can be quite challenging and it’s hard to know which are the best. I have compiled together this list of best sites to learn photography suitable for beginners and intermediate learners. This post contains some affiliate links. I’ll receive a small commission without affecting at all the price you pay for the items.
1) CreativeLive
CreativeLive empowers you to unleash your potential by bringing the world’s greatest experts directly to you, live. This site offers many specialized online workshops in photography, design, business, or software training, as well as a few general beginner's courses.
I like CreativeLive because many classes featured professionals like John Greengo. The materials are digestible and easy to get through and production values are top-notch and in high-definition.
You can take several free CreativeLive classes to gauge how it works. Many of the photography classes are free, for example.

What are the best CreativeLive classes?
Fundamentals of Photography 2019
Taught by an award-winning photographer, John Greengo, this course is a very well prepared one. It covers everything from basic camera settings, composition, or digital post-processing. The main focus of this program is on great visuals and experiential learning.
I really honestly can say that this is one of the most impressive courses for beginner photographers.
If you're looking for a more practically focused course for portraiture, select this one by Lindsay Adler. It covers all the basics of shooting portraits, lighting, and lens selections or advanced posing techniques.
Adobe Photoshop CC Bootcamp
This course will get you started with Photoshop quickly and easily. Learn essential Adobe Photoshop CC skills like masking, selections, retouching, layers and compositing.

You can Sign up Here for free.
2) Udemy
Udemy is the market leader in online education. More than 24 million students from all over the world have used its services, with over 35,000 instructors offering their courses. Online courses are based on videos mostly in English (but courses in other languages are also available). You can choose from a wide range of topics from business and marketing to IT, programming and web design to lifestyle, photography or fitness.
What are the best Udemy classes?
Photography Masterclass 1.0: A Complete Guide to Photography

The course by Phil Ebiner and Sam Shimizu-Jones provides an amazing opportunity to become a skilled photographer. The lectures cover a variety of techniques for taking super photos. This certification is aimed at photographers from every experience level.
You can Sign up Here for free.
3) Lynda.com
An online educational site with a vast array of multimedia learning experiences and serves more than 10,000 businesses and provides lessons in five languages. Lynda.com is one of the oldest educational platforms. The company was founded in 1995 and focused only on the production of video tutorials.
What are the best Lynda classes?

A quick and easy 30 minutes session designed to give you a feel for what it's like being a working photographer. This course quickly dives into different styles of cameras, lighting techniques, and post-processing programs.
You can Sign up Here for free.
4) Skillshare
SkillShare is an online course marketplace and is based on the idea that anyone can be a teacher or a student. Sometimes one course may not be enough to help you master a subject as vast as photography. There are practically more than a 100 classes, of which you can choose the ones that suit you the most. Classes include projects which you can share and compare with others in the Skillshare community. The site provides a one-month free trial to try it out.
What are the best Skillshare classes?
DSLR Photography II: Understanding Lenses, Focal Length & Shooting

Unlock professional-level of photography in just 60 minutes.
The DSLR photography course consists of 11 chapters of videos that cover lens anatomy, focal length, deep dive to portrait, object, street, and landscape photography, editing tips & tricks, final thoughts, and bonus tips.
You can Sign up Here for free.
5) Coursera
Coursera is leading online educational platforms that offer courses on various digital, business and other popular topics. The photography specialization is available from Michigan State University. It offers online public courses called Massive Open Online Course (MOOC) and Open Educational Resources (OERs) about almost every subject, from poetry to physics.
Photography Basics and Beyond: From Smartphone to DSLR Specialization

This specialization in photography created by Michigan State University aims to cover a wide array of topics. There are 5 courses in this specialization:
Cameras, Exposure, and Photography
Camera Control
Principles of Photo Composition and Digital Image Post-Production
Photography Techniques: Light, Content, and Sharing
You can Sign up Here for free.